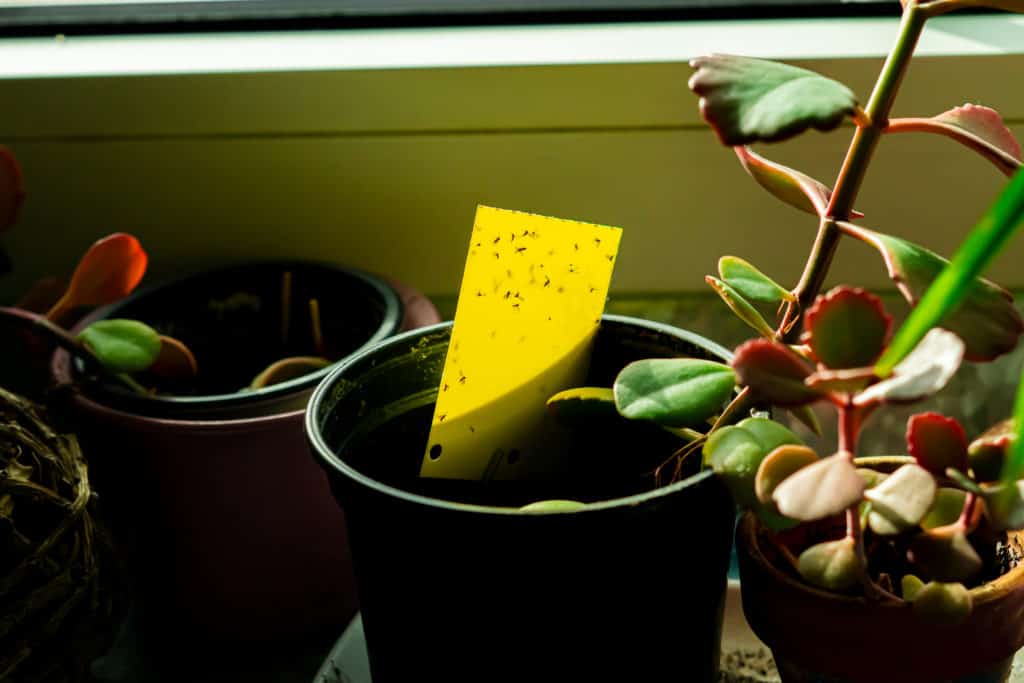
Whether you’re a longtime gardener or a complete newbie at this fanatic houseplant lifestyle, you probably will come across a sick plant at some point despite your best care. But the question now is… how did they get there?
Typically, a pest infestation or disease infection can be caused by the following:
- Improper care. Don’t blame yourself too much; we’ve all been there before.
- The plant was infested/infected when you purchased it. Sometimes this happens despite your best efforts of inspecting the plant before purchase.
- You accidentally bought contaminated potting mix or soil. From time to time, purchased potting mixes and soil are contaminated. Unfortunately, you may not find out till days or weeks later after you have already potted your plants.
When left unchecked, pests and/or diseases can get out of control and wreak havoc on your whole indoor garden. So here is an A-Z guide on identifying, eliminating, and preventing common houseplant pests and diseases from killing off your dear plants.
(As an Amazon Associate, I earn from qualifying purchases.)
Table of contents
- 1. Identify Symptoms of Pest Infestation & Diseases on Houseplants
- 2. Isolate your Infested/Infected Plant from the Rest of the Plants
- 3. Pick the Pests Off or Hose the Plant Down with Short, Bursts of Water
- 4. Snip off Infected Leaves, Flowers, and Stem(s) on the Plant
- 5. Apply Neem Oil Solution Spray on your Plant Weekly for 1 ½ Months
- 6. Rejoin your Plant Back with the Rest of the Plants
1. Identify Symptoms of Pest Infestation & Diseases on Houseplants
Identifying pests and diseases that are eating away at your plant can be tricky sometimes. This is because both can have very similar symptoms or, worse, both pests and diseases could be attacking your plant simultaneously! For example, most pests like wet conditions, so you may diagnose your plant with root rot due to overwatering. And you are not wrong in fact if you found squelchy brown/black roots you would be exactly right. But, say after repotting, the plant still hasn’t recovered. Then upon a closer inspection, you realize that you overlooked the parasitic pests hiding away in the plants’ foliage. The horror factor here is similar to finding out you slept through your alarm, remembering you’re no longer a student, then remembering you’re the teacher.
So how do we figure out what is making the plant sick? Here are the general symptoms you should keep an eye out for on your plant:
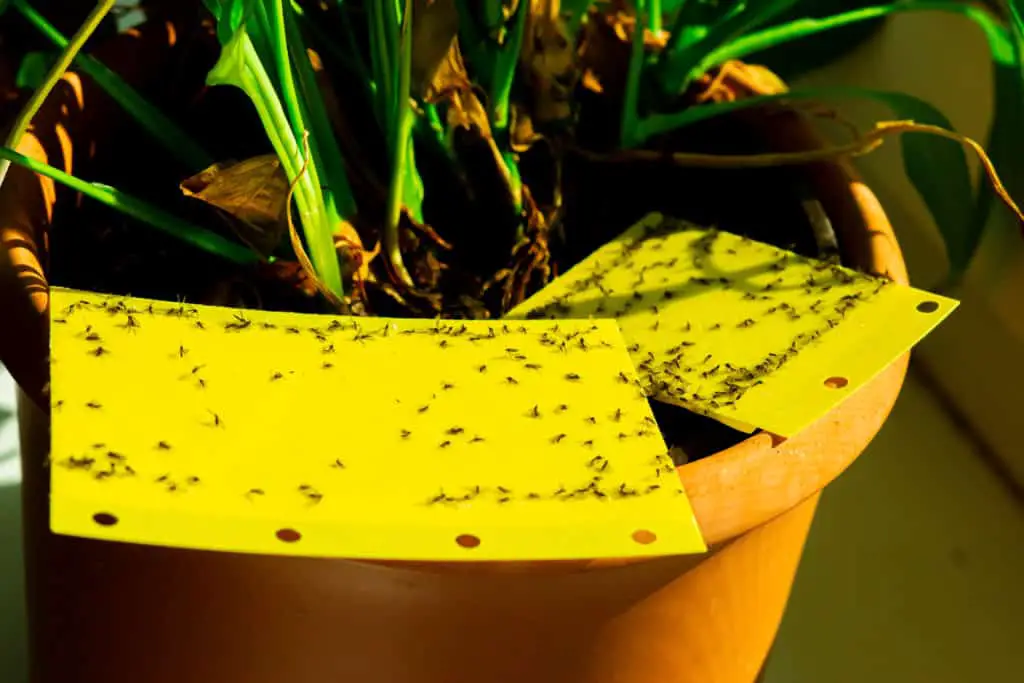
- Tiny flying insects that look like fruit flies flitting around your plant every time you water. These are fungus gnats, which don’t really harm your plant but indicate that you are definitely overwatering your plants. Fungus gnats lay their eggs in wet soil where their eventual larvae feed on the plentiful decaying matter. This may include anything from rotting roots to decomposing leaves on the topsoil.
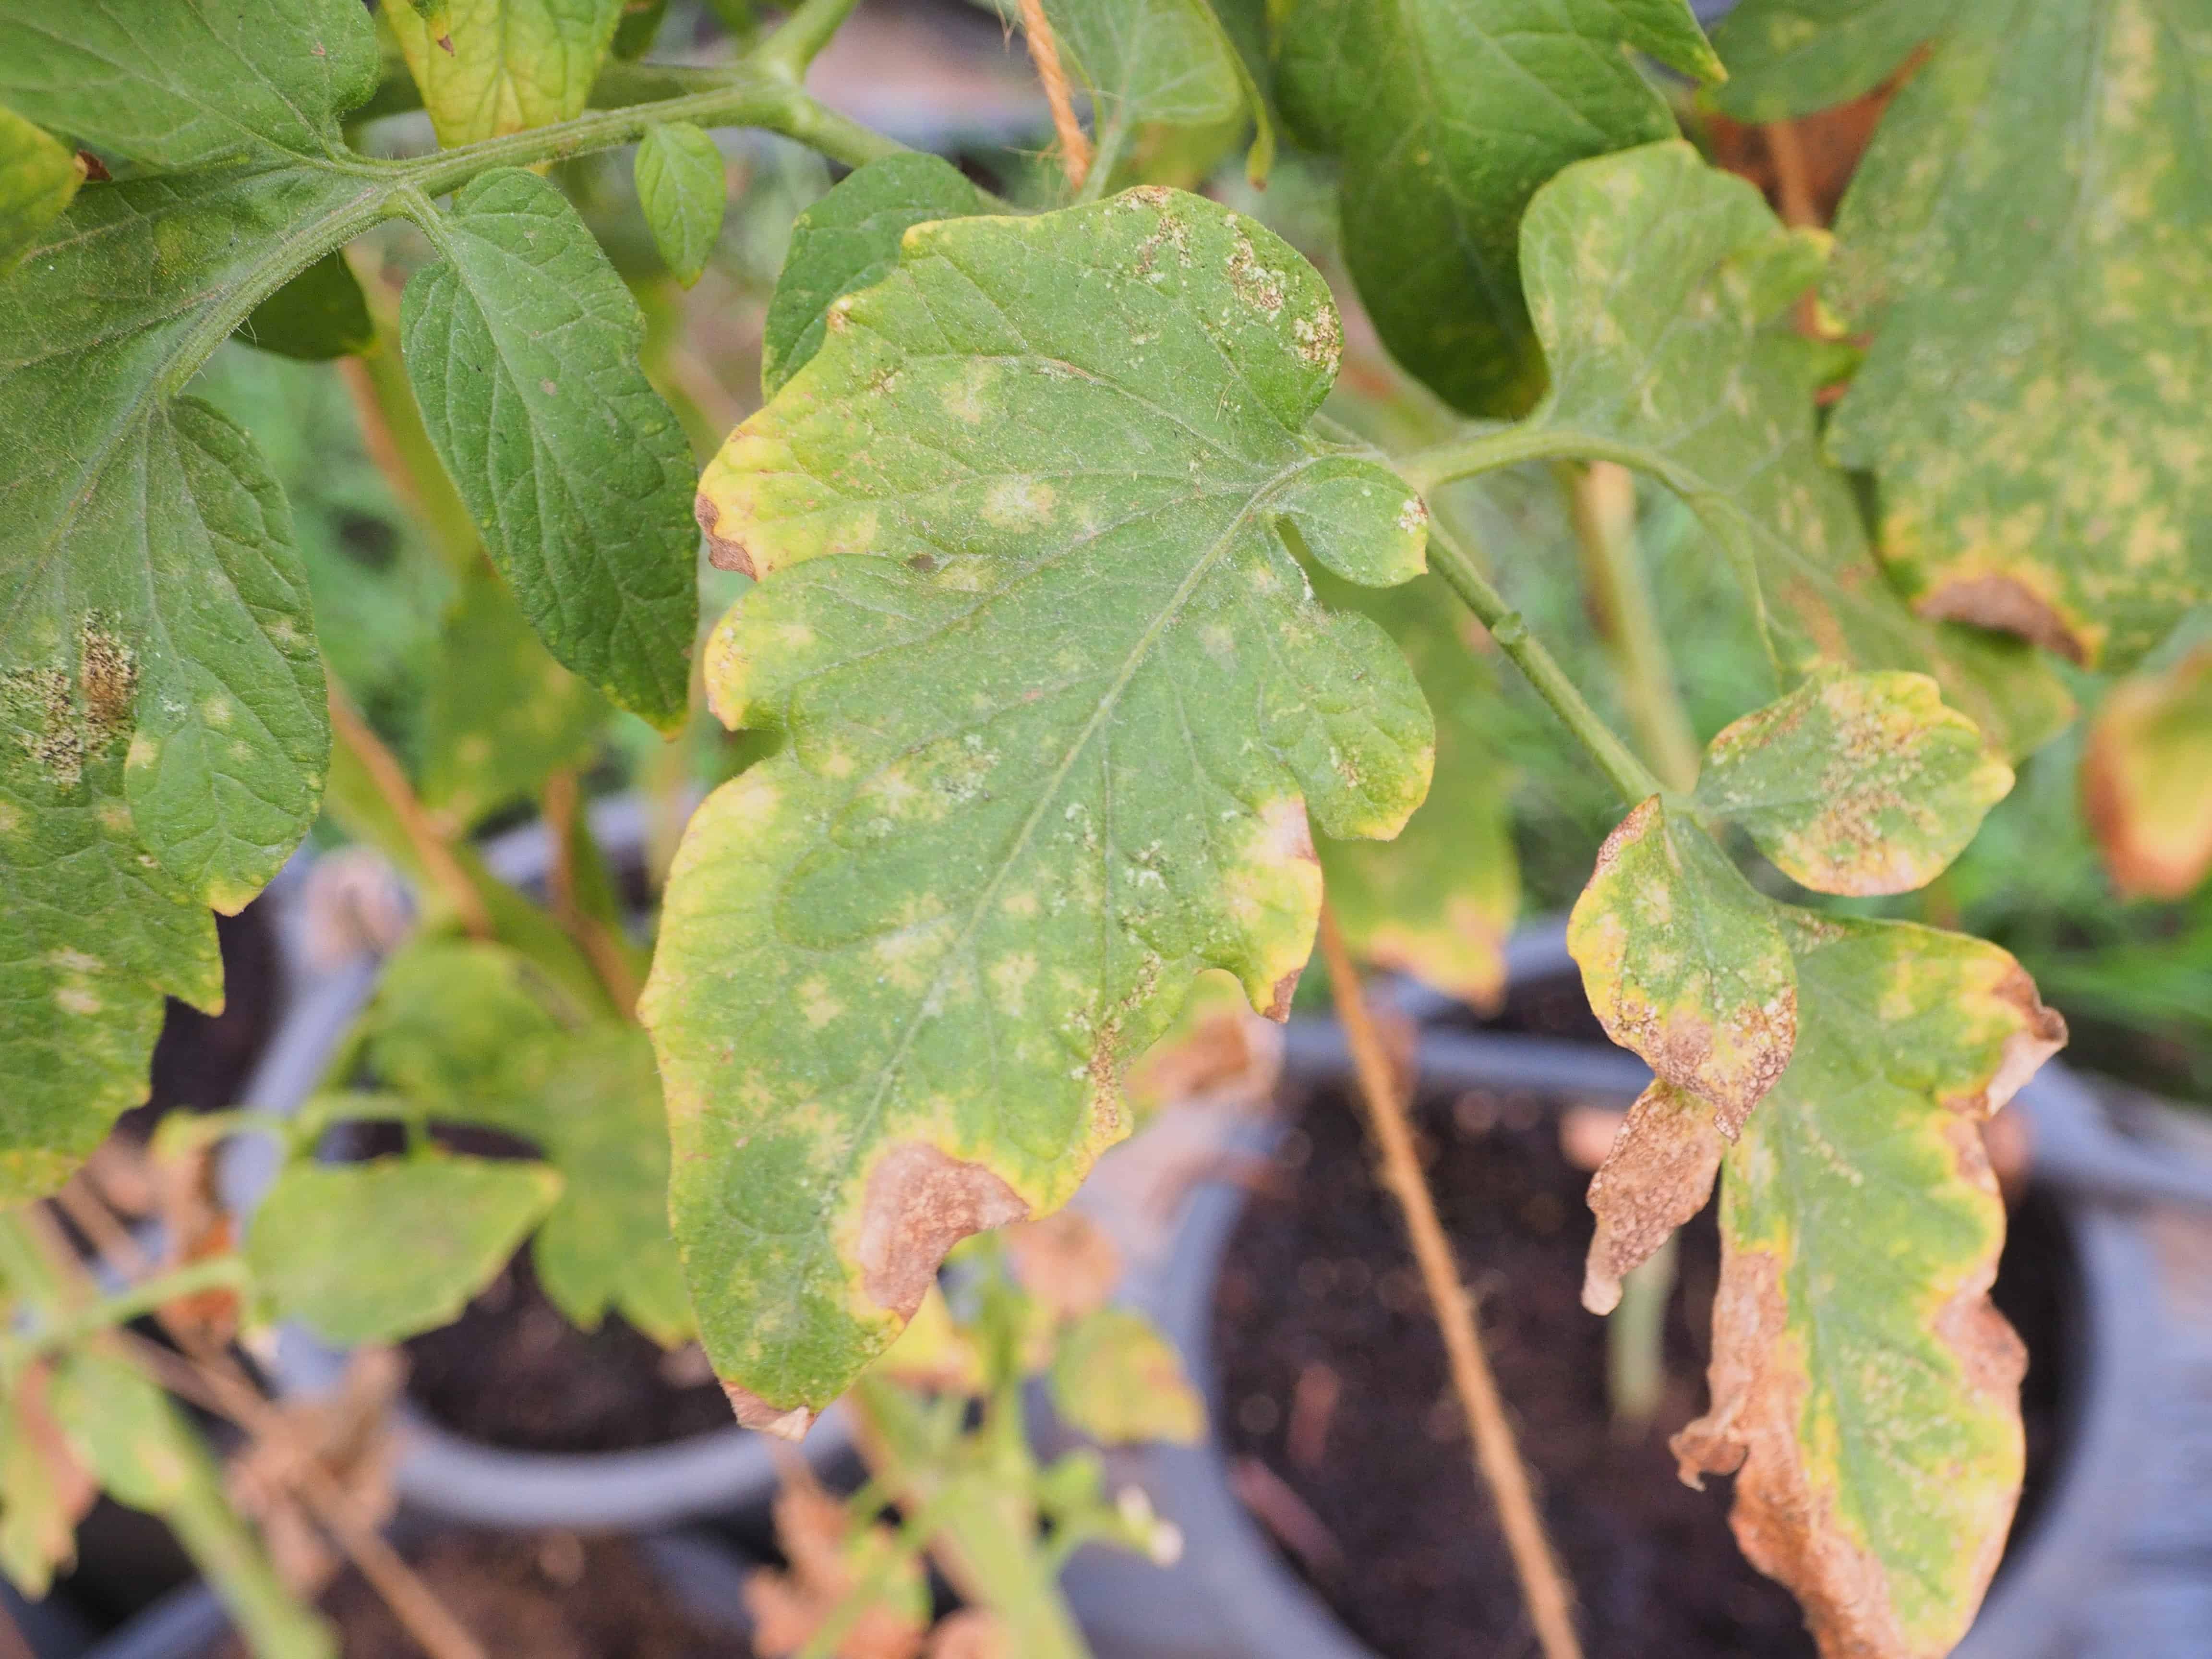
- Slits on the leaves and stem(s) with silver/white discoloration. These slits are punctured marks left by thrips, a pest that sucks out the content of the leaves, leaving behind only the ‘skeleton’. This symptom usually comes with tiny black dots, which are, you guessed it, insect poop after they had their feast.
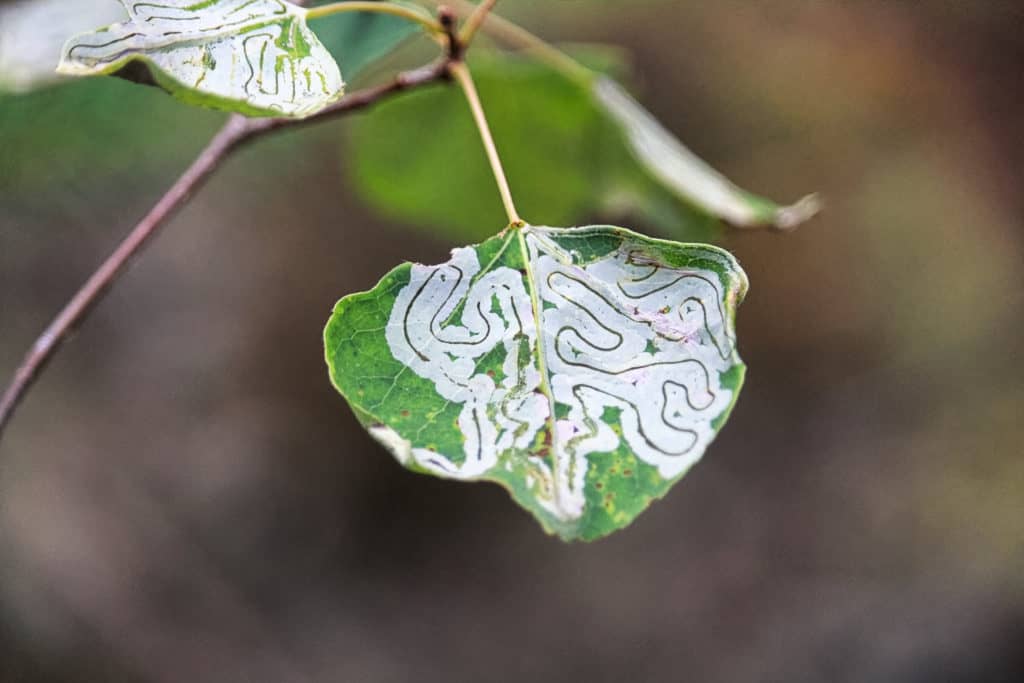
- Irregular blotches and discolored, wriggly trails within the leaves. These are caused by pests called leafminers which are larvae of different insects that laid their eggs inside the leaves. The visible trail and blotches in the leaves are the pests eating their way around in the leaves.
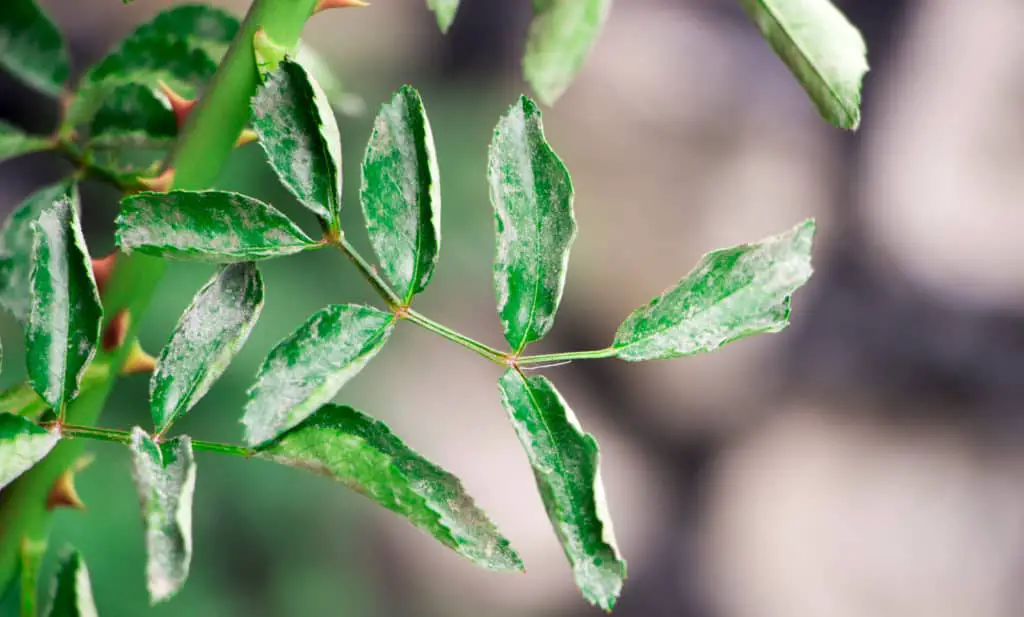
- White cotton candy-like fuzz or sticky droplets on the plant’s leaves and stems. These fuzz/droplets are honeydew secretions (read: insect pee) from sap-sucking pests such as aphids, scales, mealybugs, whiteflies, and red spider mites. Interestingly, adult mosquitoes are a fan of these sweet excretions, too, so don’t be surprised if you see some hanging around your plant too. You can read more about this in another article I wrote here.
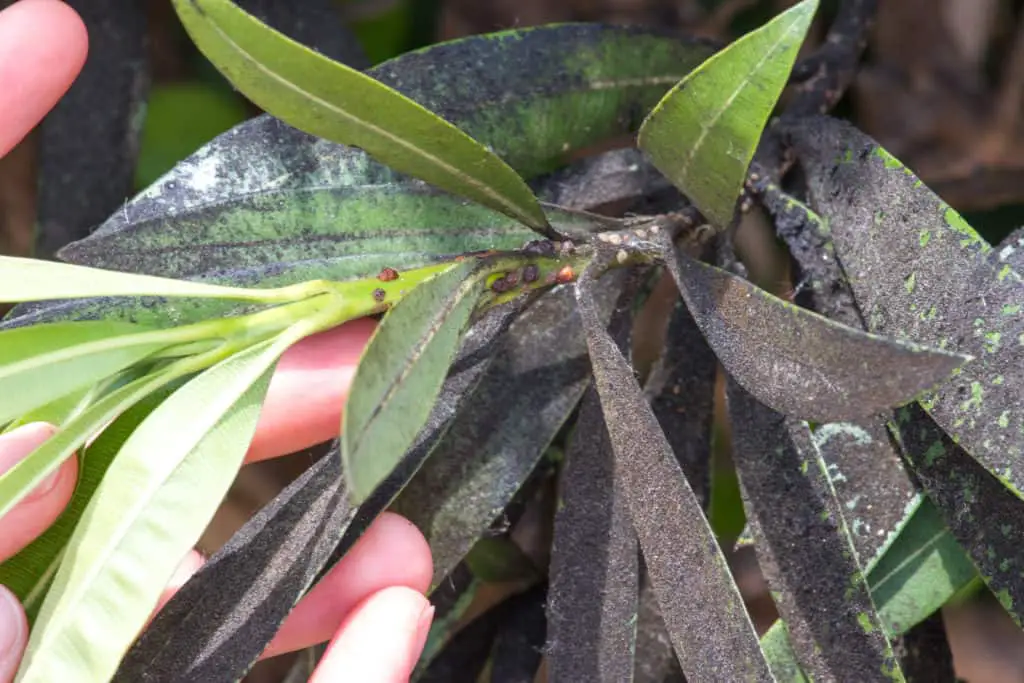
- Sooty mold on the leaves that looks like grimy, dark splotches. This disease is a result of fungal spores that love feeding on the pest’s honeydew secretions. Honestly, the obsession with sweet insect pee here is concerning in the bug and fungal world. Sooty mold doesn’t damage the plant, but it will weaken when the splotches grow more prominent on the leaves. This will block the much-needed sunlight that the plant needs to develop well. However, your primary concern here is the pests currently living in the plant.
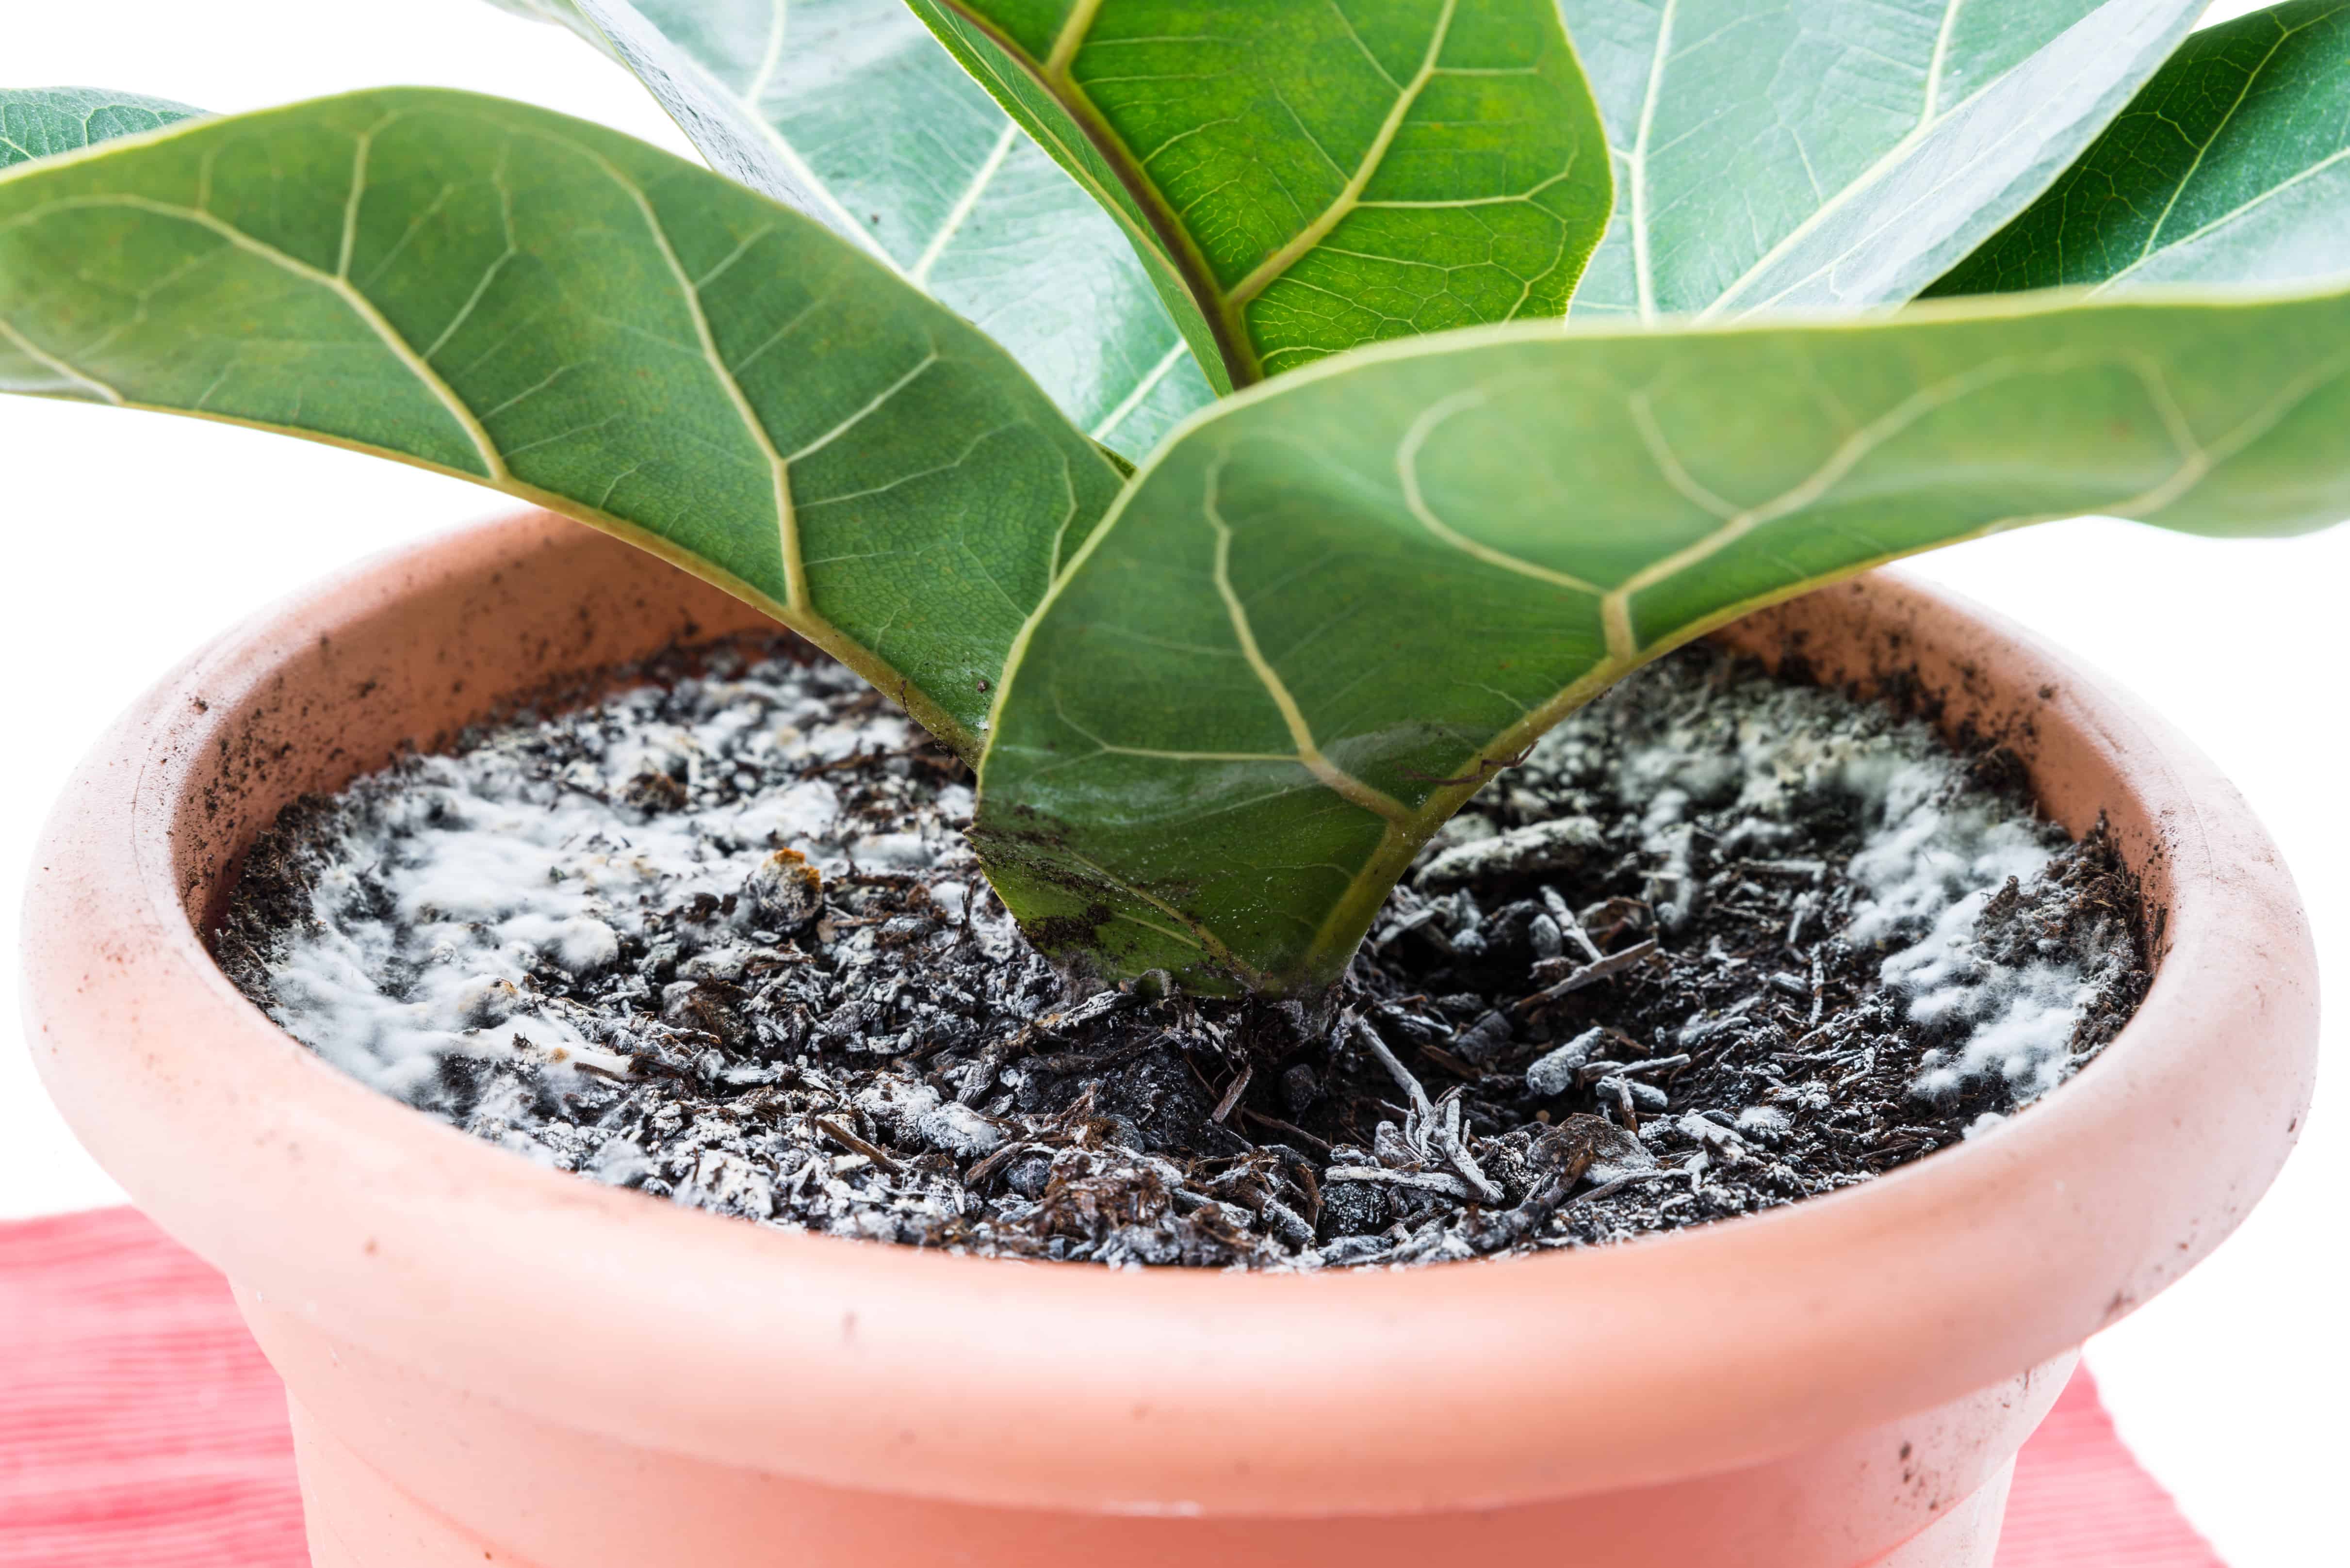
- Fluffy cotton-like clumps are covering the topsoil of your plant. This disease is white mold and, luckily, doesn’t affect your plant at all. But it does indicate that there is something you need to address.
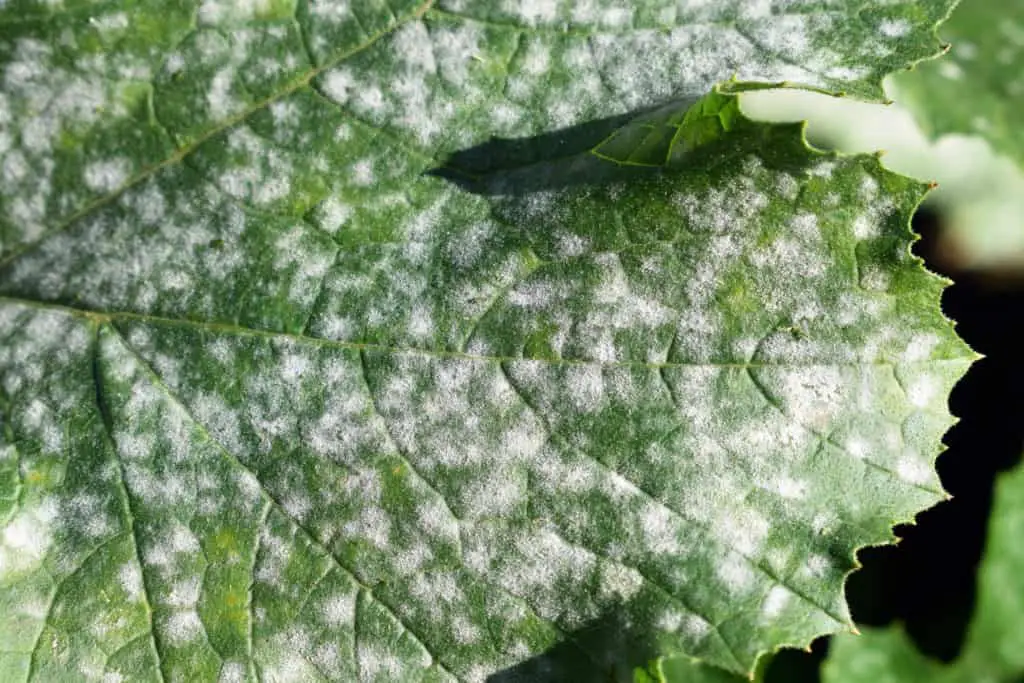
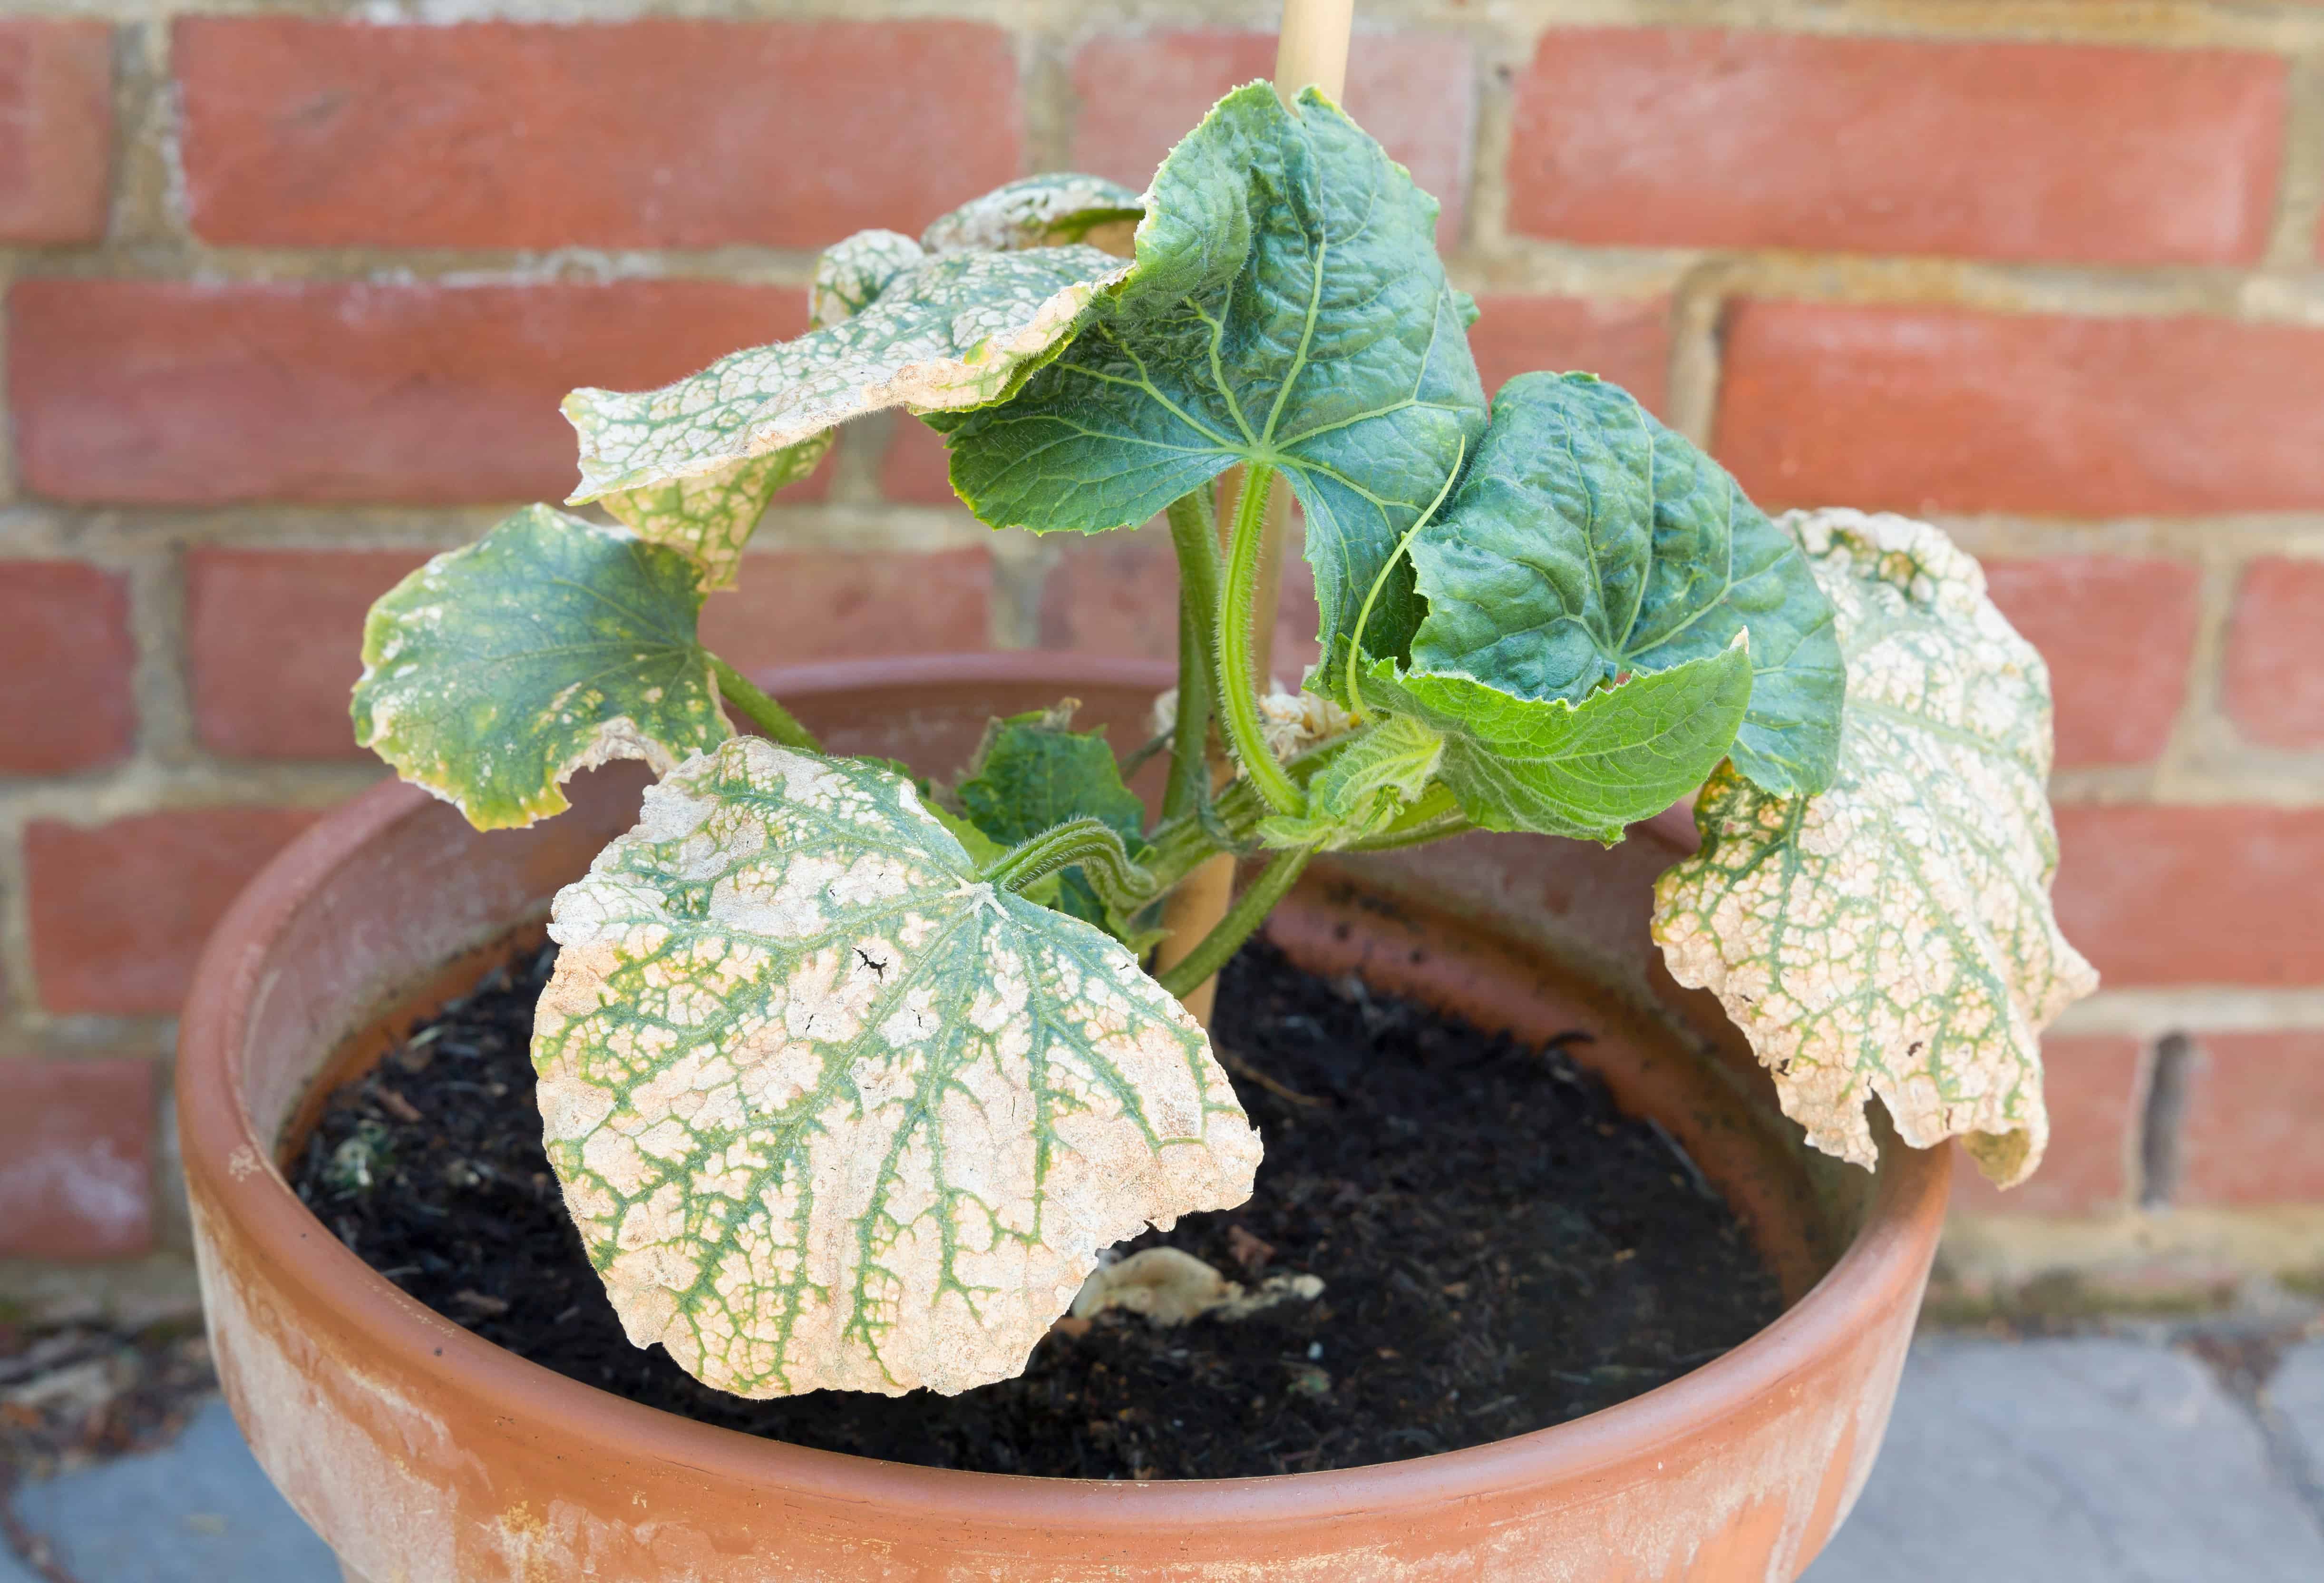
- White, powderlike dusting on the plant’s leaves. Unless you’ve been eating powdered donuts by your plant, this symptom means your plant has powdery mildew. This disease won’t damage your plant, but it will weaken it because dry brown spots will eventually form on the leaves where the white dustings are.
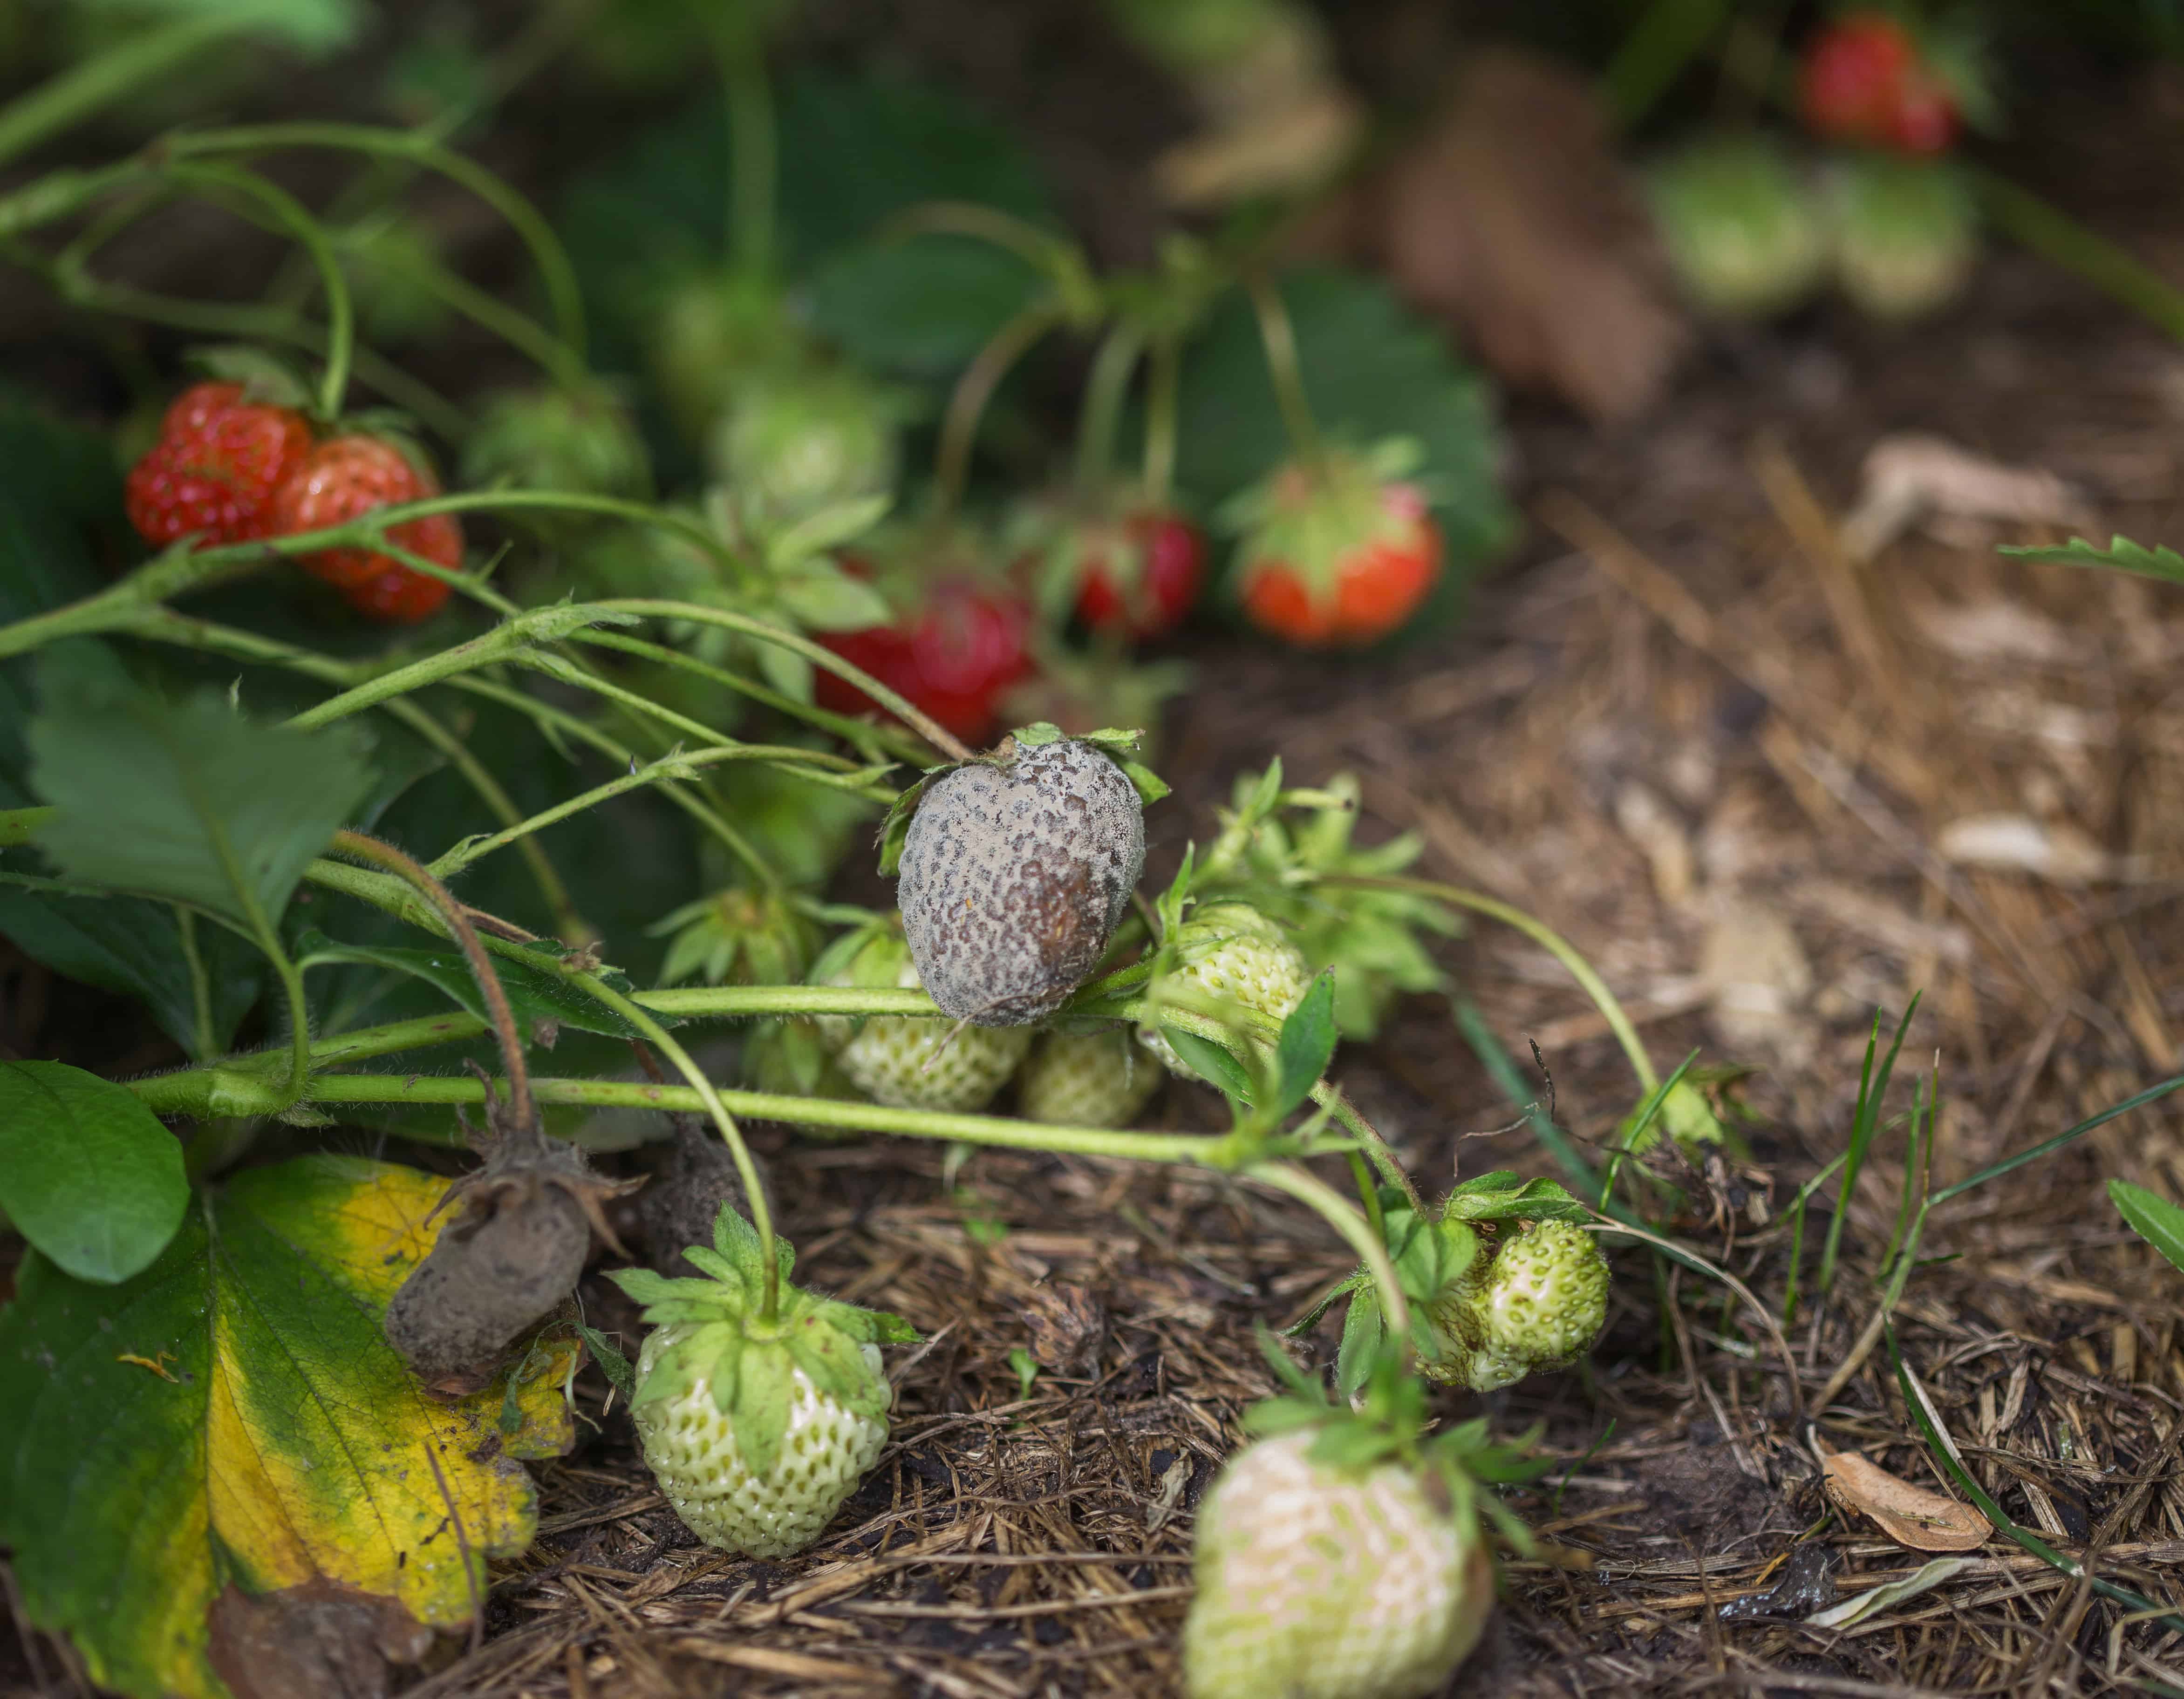
- Fuzzy, grey-ish areas on the leaves, stems, flowers or fruits. This disease is grey mold and is quite damaging if it gets into broken, open parts of a plant. It could cause anything from brown spots on unopened flower buds to sunken lesion rings on the stem(s).
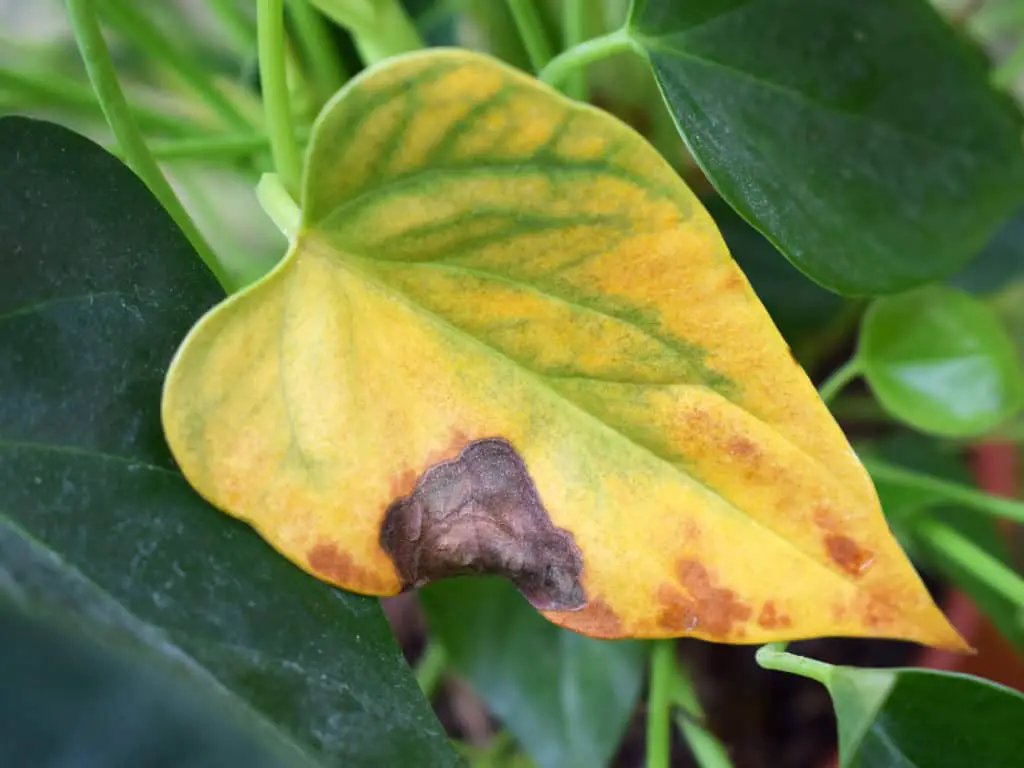
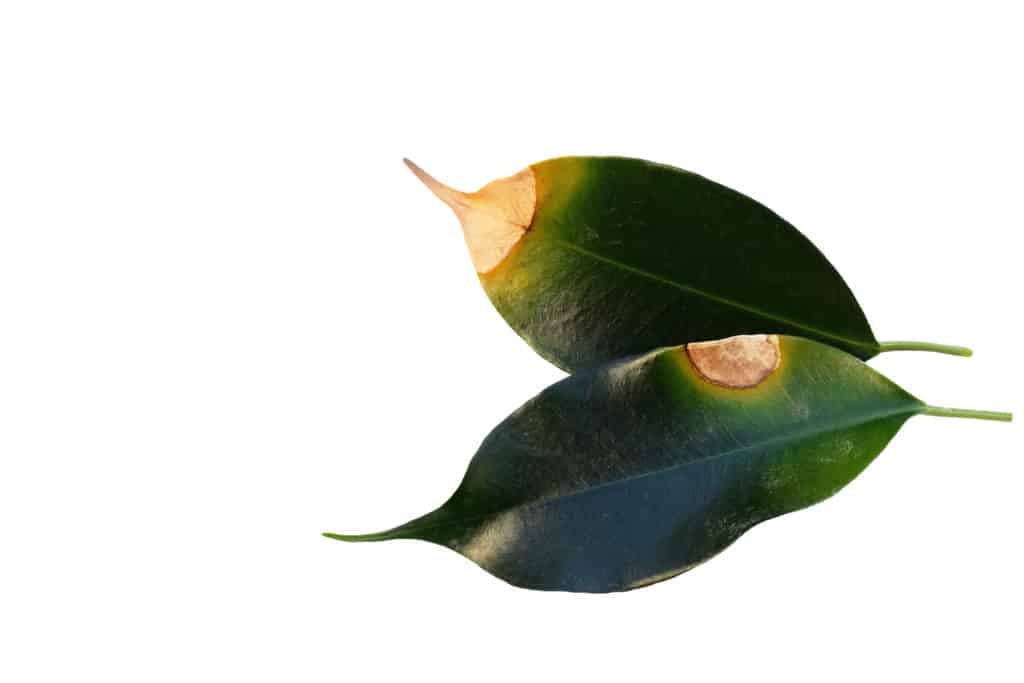
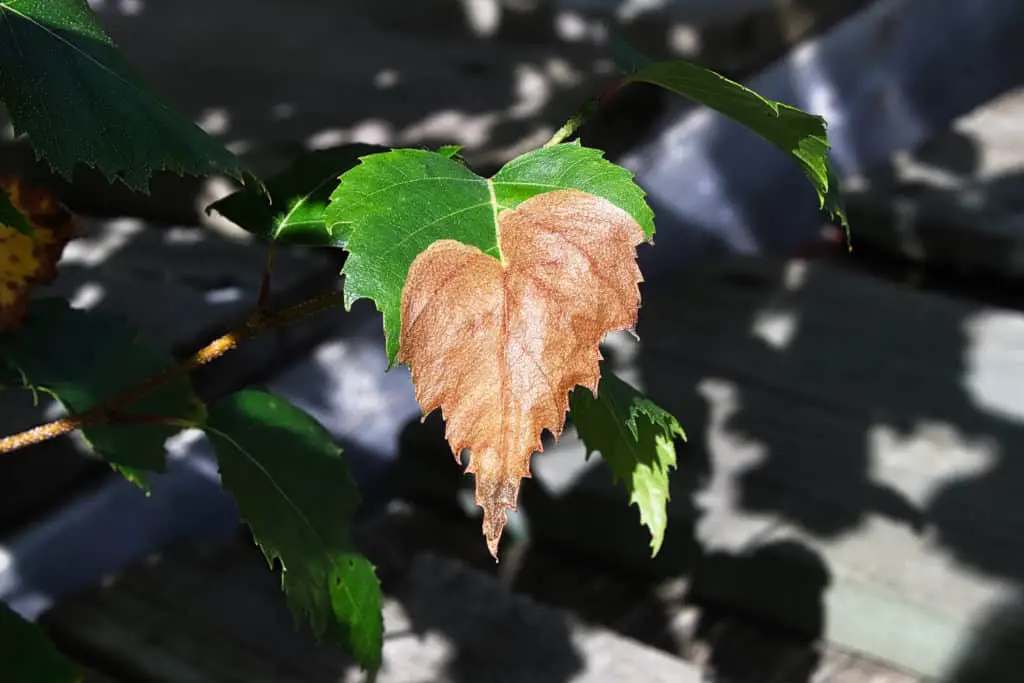
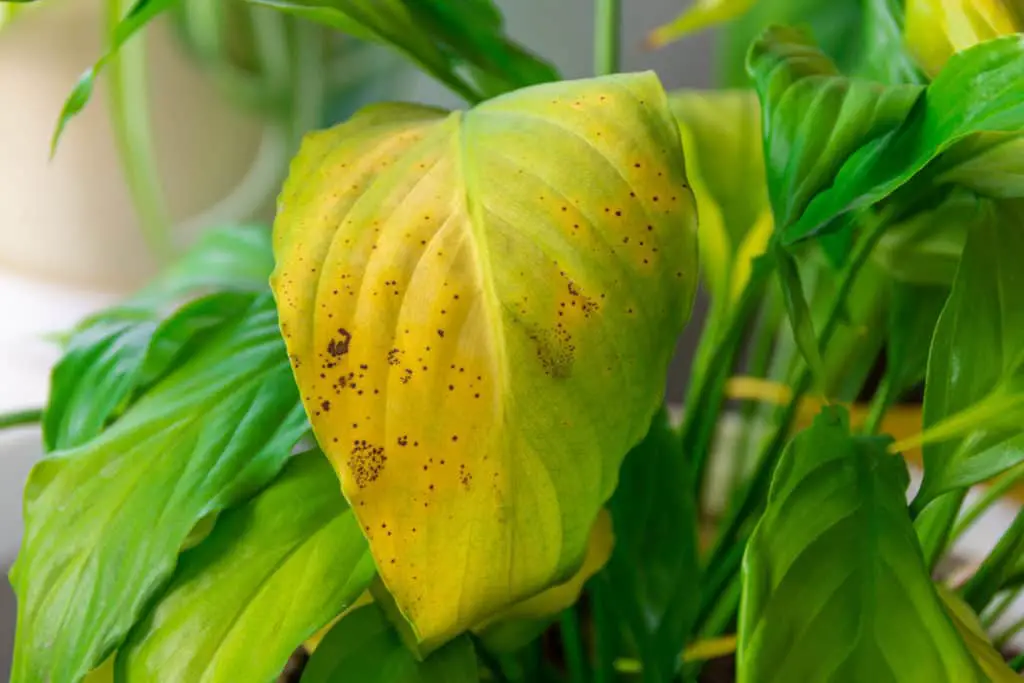
- Multiple brown, reddish-yellow, or black spots with rings on the plant’s leaves. This symptom could be various diseases like fungal leaf spots, bacterial leaf spots, rust, or anthracnose. But one thing is sure, these diseases can potentially kill your plant off.
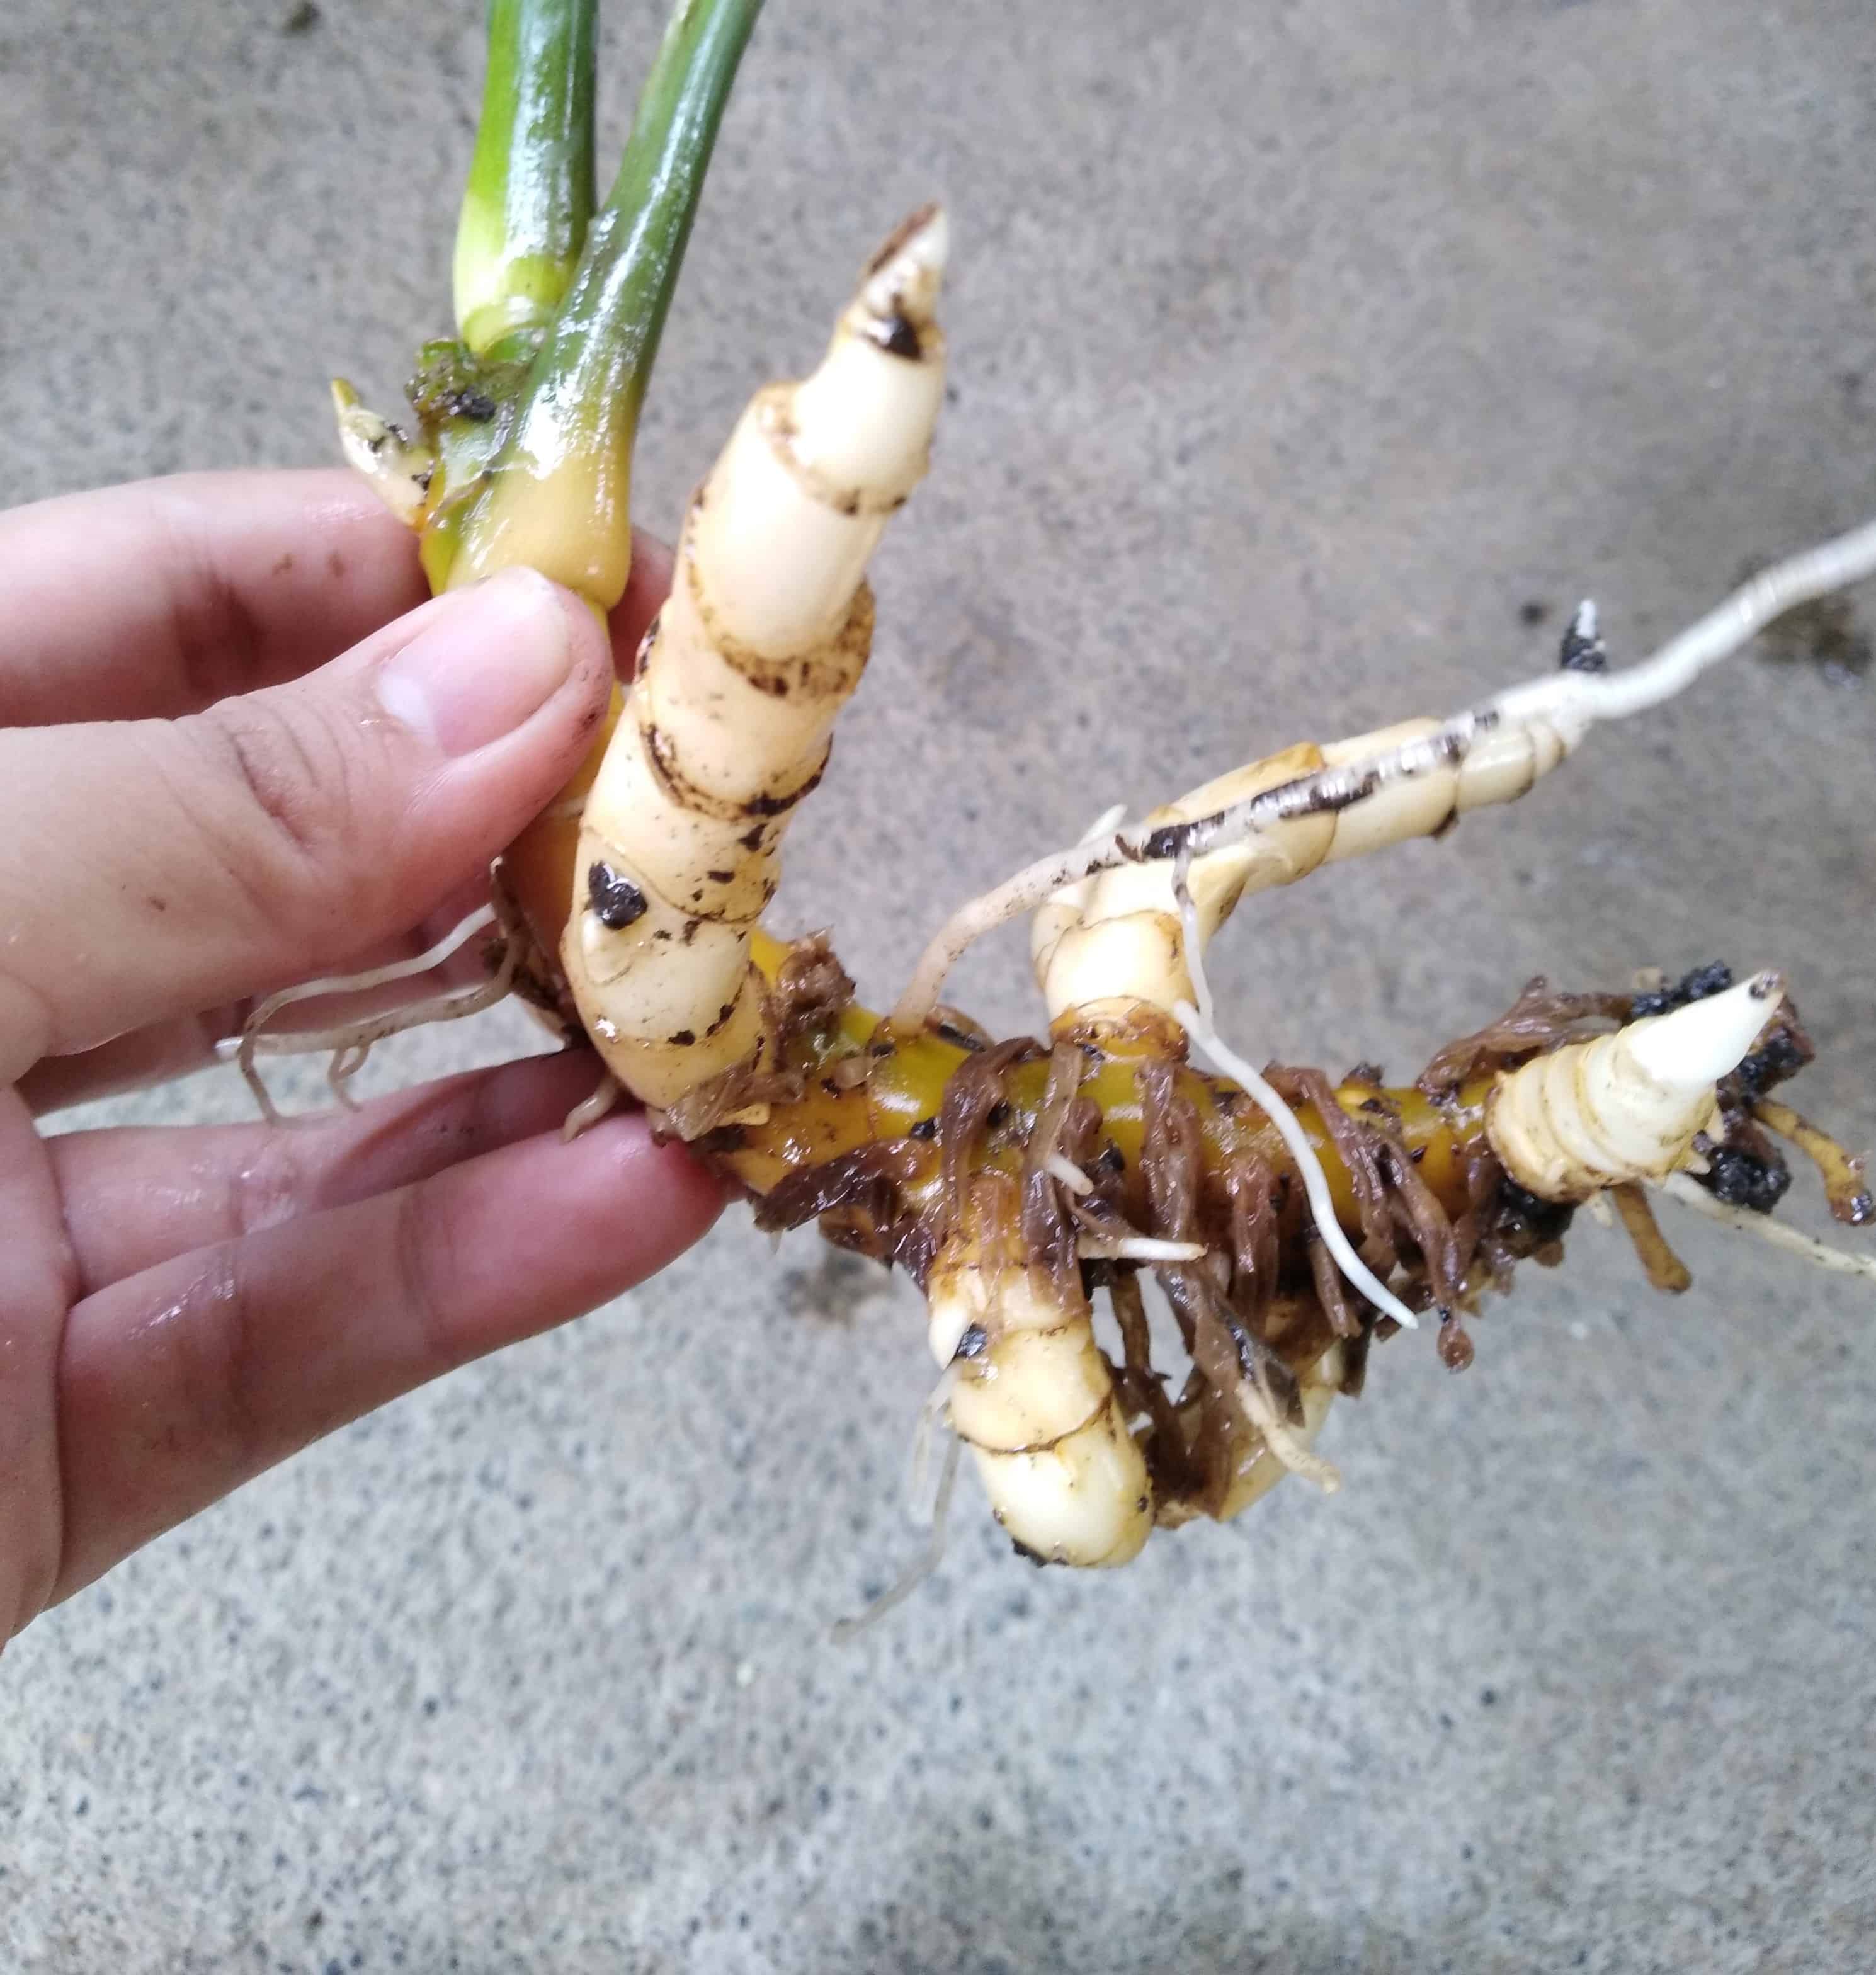
- A foul stench is coming from your plant. Unless your pet decided to make your potted plant its litter box, then the horrid smell should tell you something is unmistakably rotting underneath the soil. The only way to check is to remove your plant from its pot and check the roots. If you see mushy brown/black roots, this means your plant has root rot. If this disease is quite extensive, you’ll see a black/brown ring at the base of the plant’s stem near the soil.
- Dark/light green mosaic pattern on the plant’s leaves. This is one of the many symptoms of a virus in a plant. Other symptoms include dead spots and yellow ring patterns on the leaves, though symptoms may vary depending on the plant type.
2. Isolate your Infested/Infected Plant from the Rest of the Plants
Once you notice any signs mentioned above on your houseplants, you should quickly quarantine your sick plant. Grab a pair of gloves, put on a mask, wear a t-shirt you don’t mind throwing out when things get messy, and bring plant zero as far away as you can from your other plants. Later on, you’ll have to go and check the rest of your plants closely to see whether they are infected or infested.
For non-pest-related illnesses (diseases) other than sooty mold, jump to step 4.
For pests, you’ll want to get a look at the culprit’s face, so you know what you’re dealing with and know how to better save your plant:
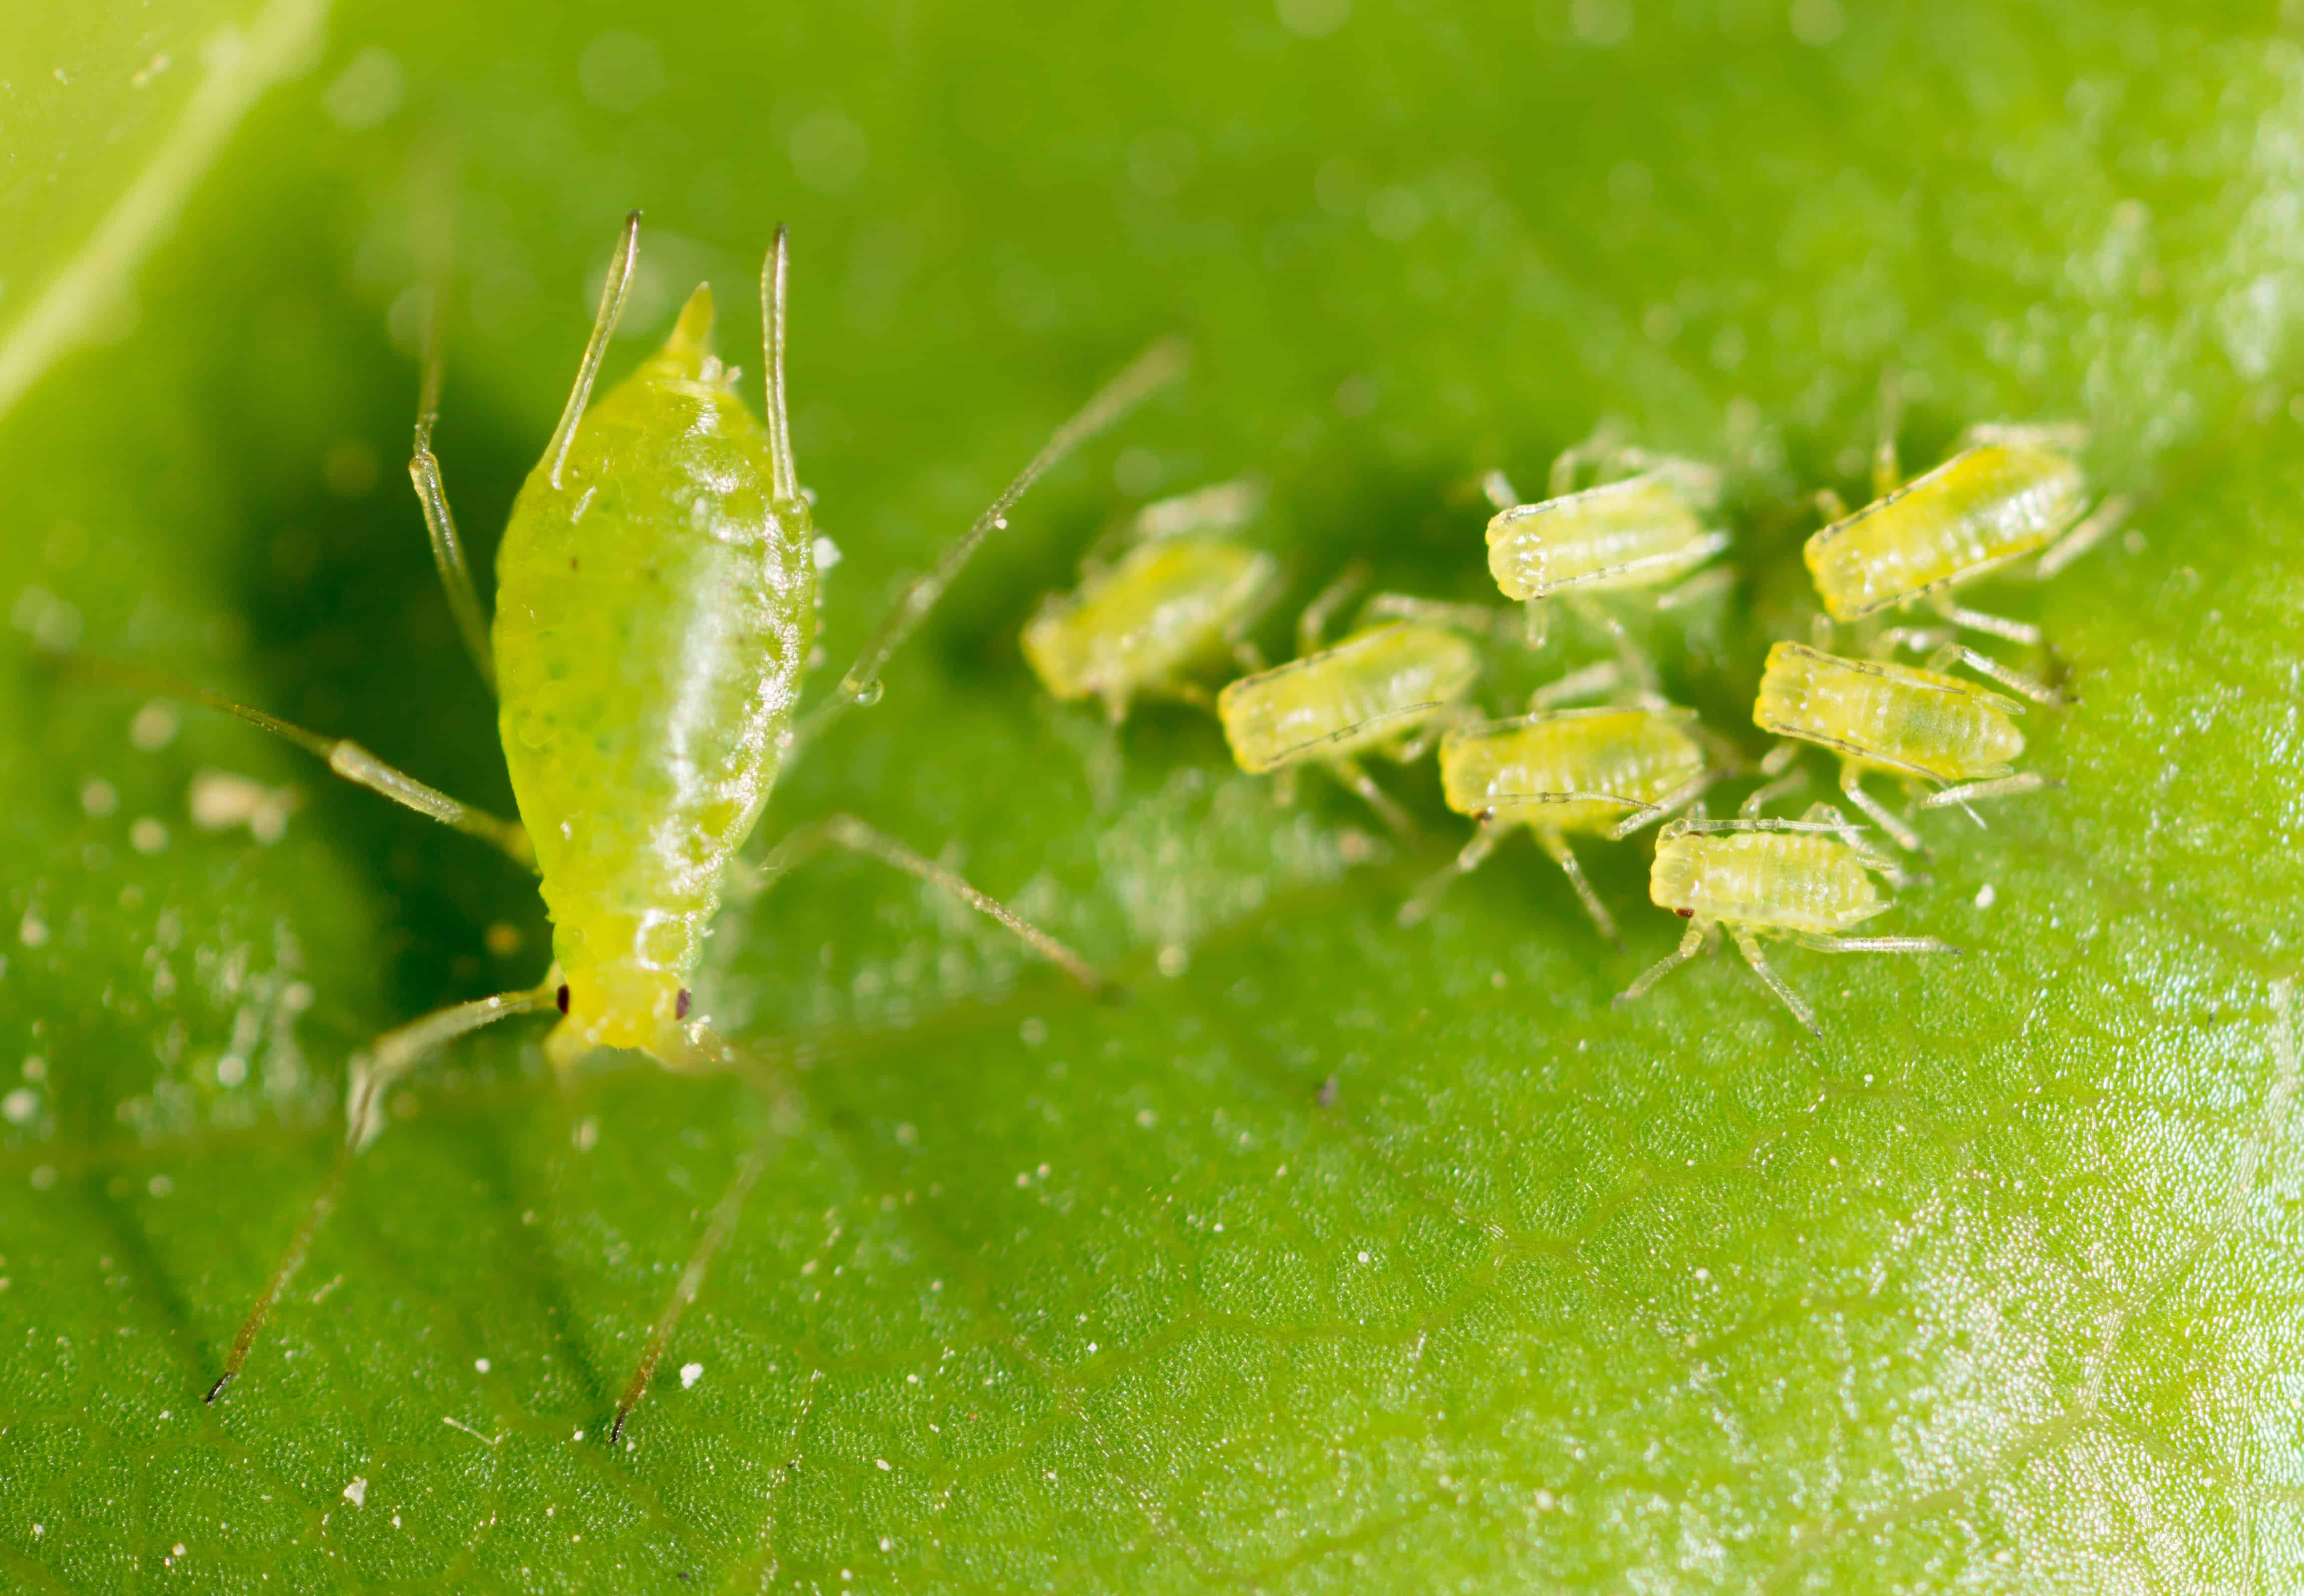
Aphids
- What do they look like? They are usually green and pear-shaped, about 2-3 mm long. Though different species can be pink, yellow, black, or brown. They are usually wingless, but if you find a few with wings, this spells trouble. It means the nest is overcrowded, and they are looking for a new innocent plant to terrorize.
- Where can I find them? Check any new growth on the plant first, as they will most likely be feasting on the plant’s sap here. Then check along the stems next and under each leaf.
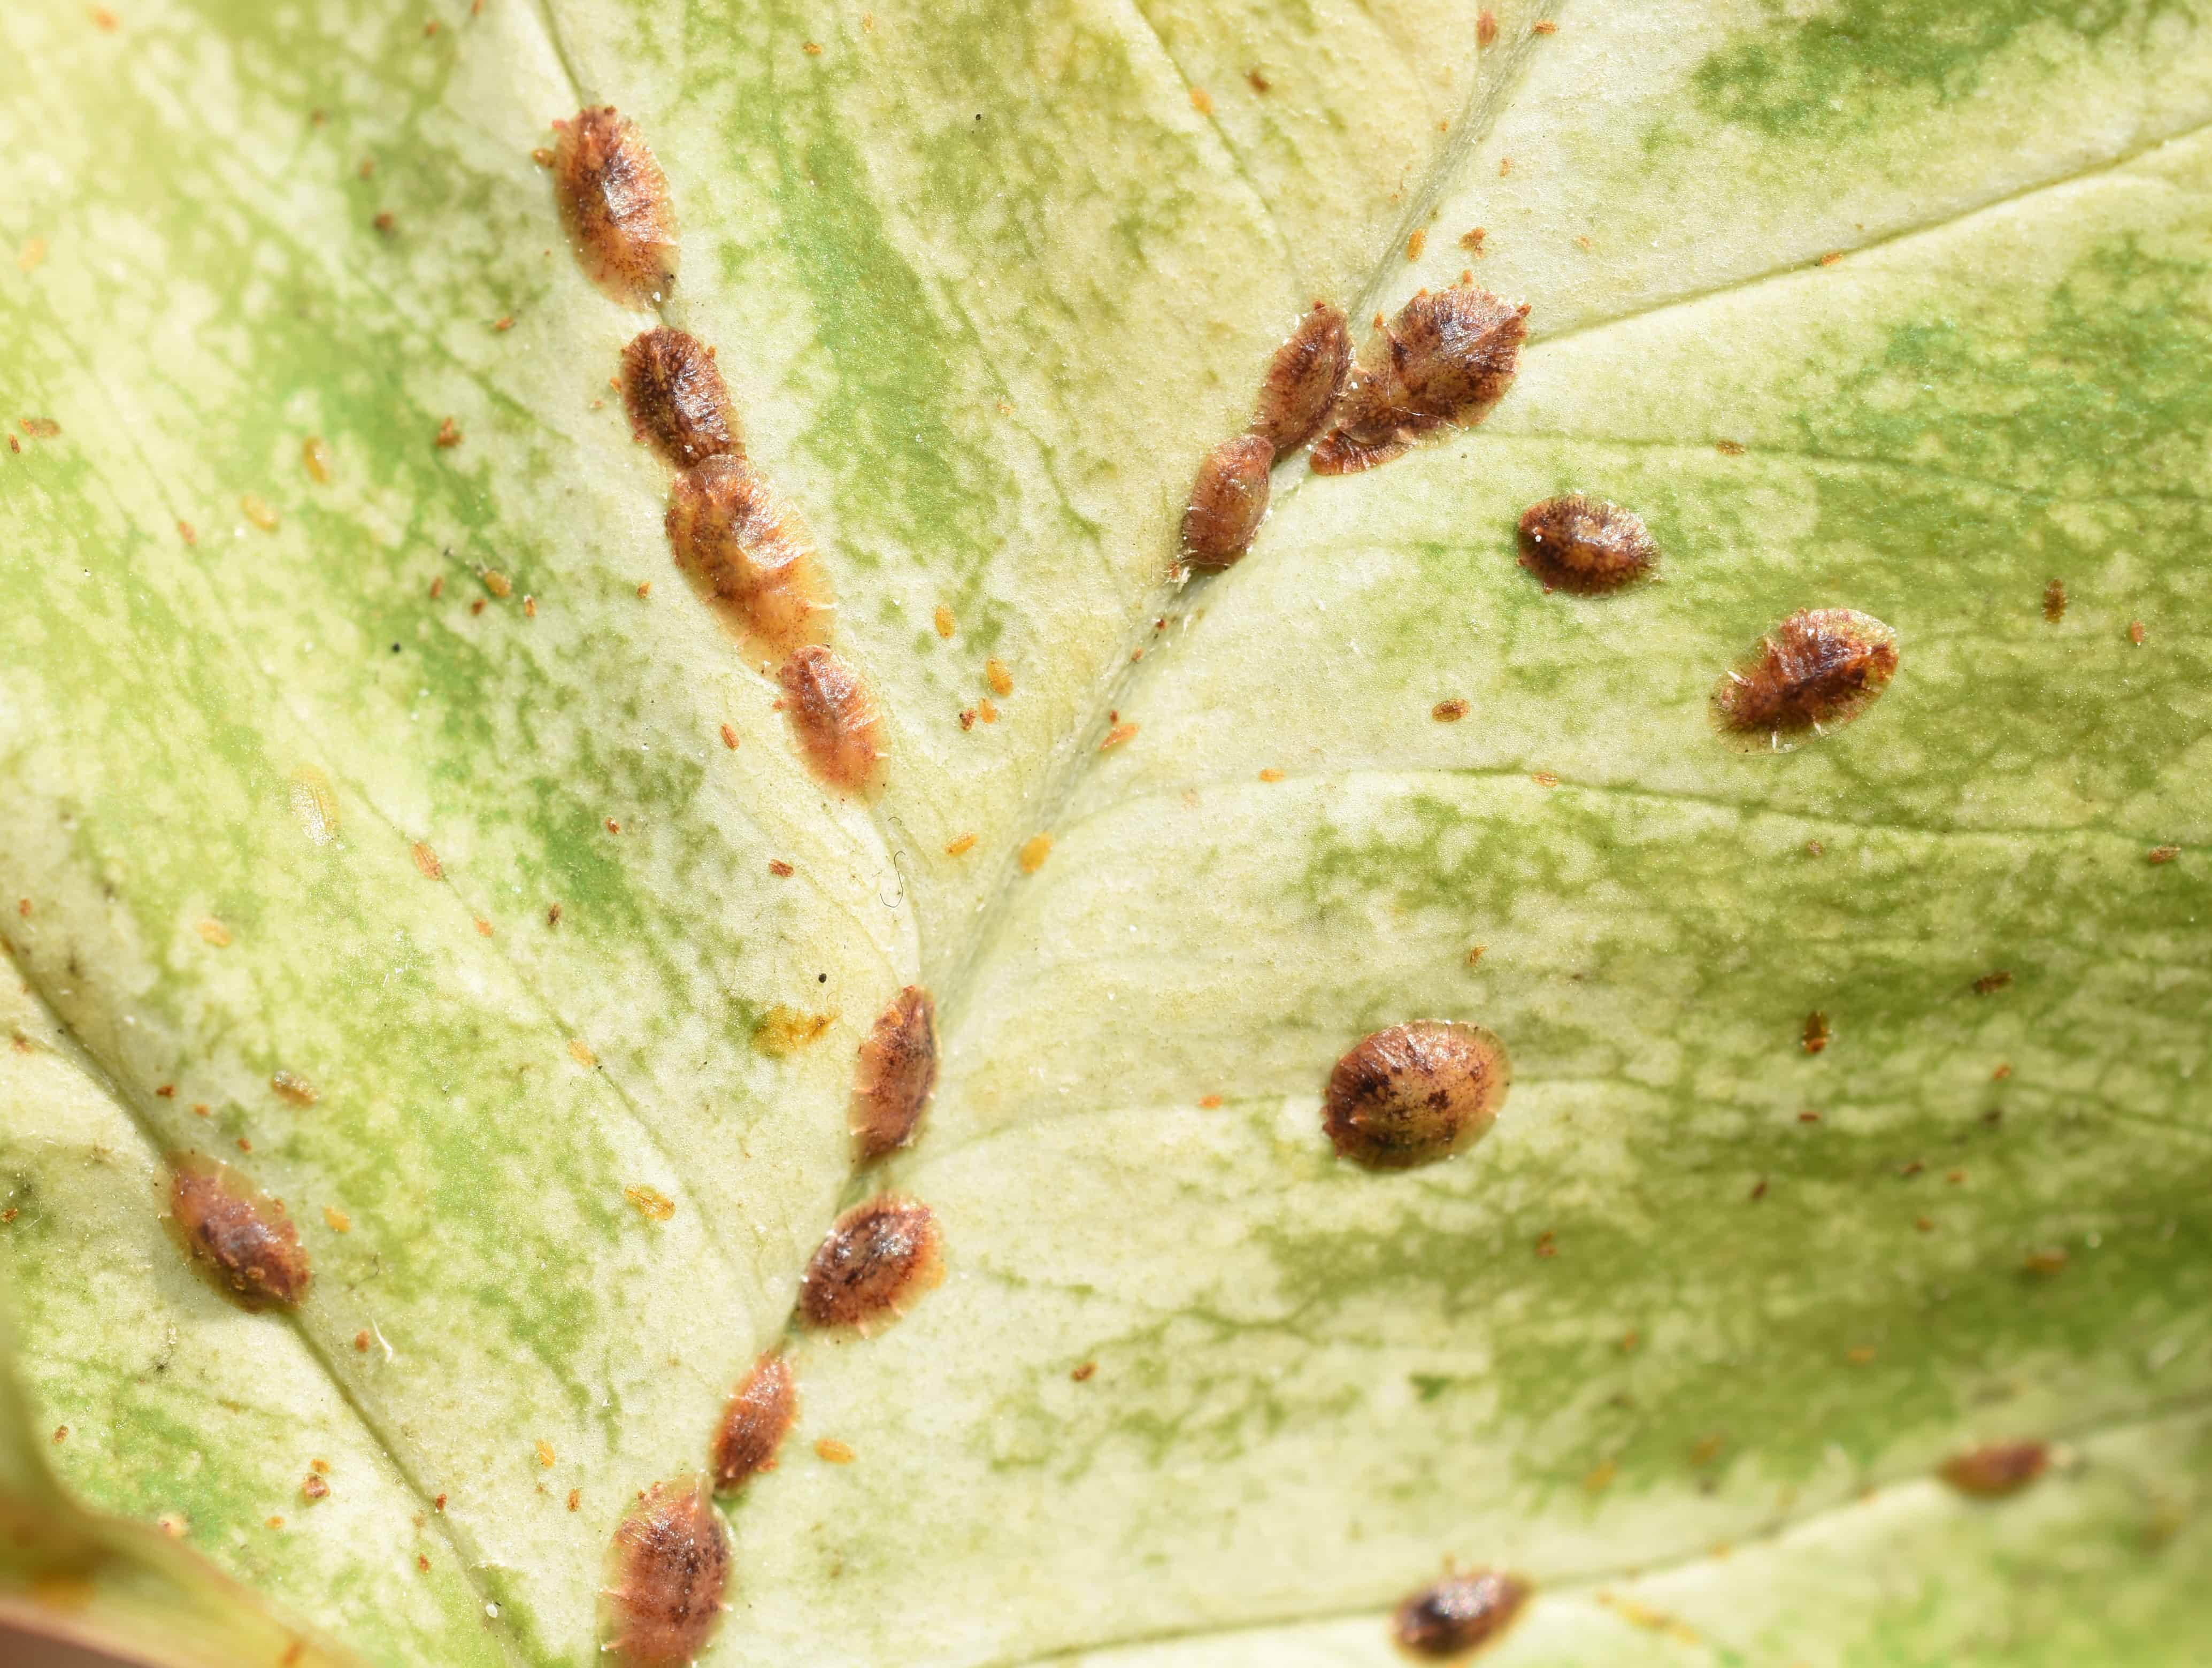
Scales
- What do they look like? They are tiny, ovular discs or nubs stuck on the plant’s stems about 3-4mm long and 1-2mm wide. Depending on their species, their colors may vary, but brown is the most common one seen. They often look like blemishes on the plant because they have stuck themselves to the plant, guzzling sap juice down like nasty little leeches.
- Where can I find them? Check under the leaves. Then the stem where they will be sucking sap juice.
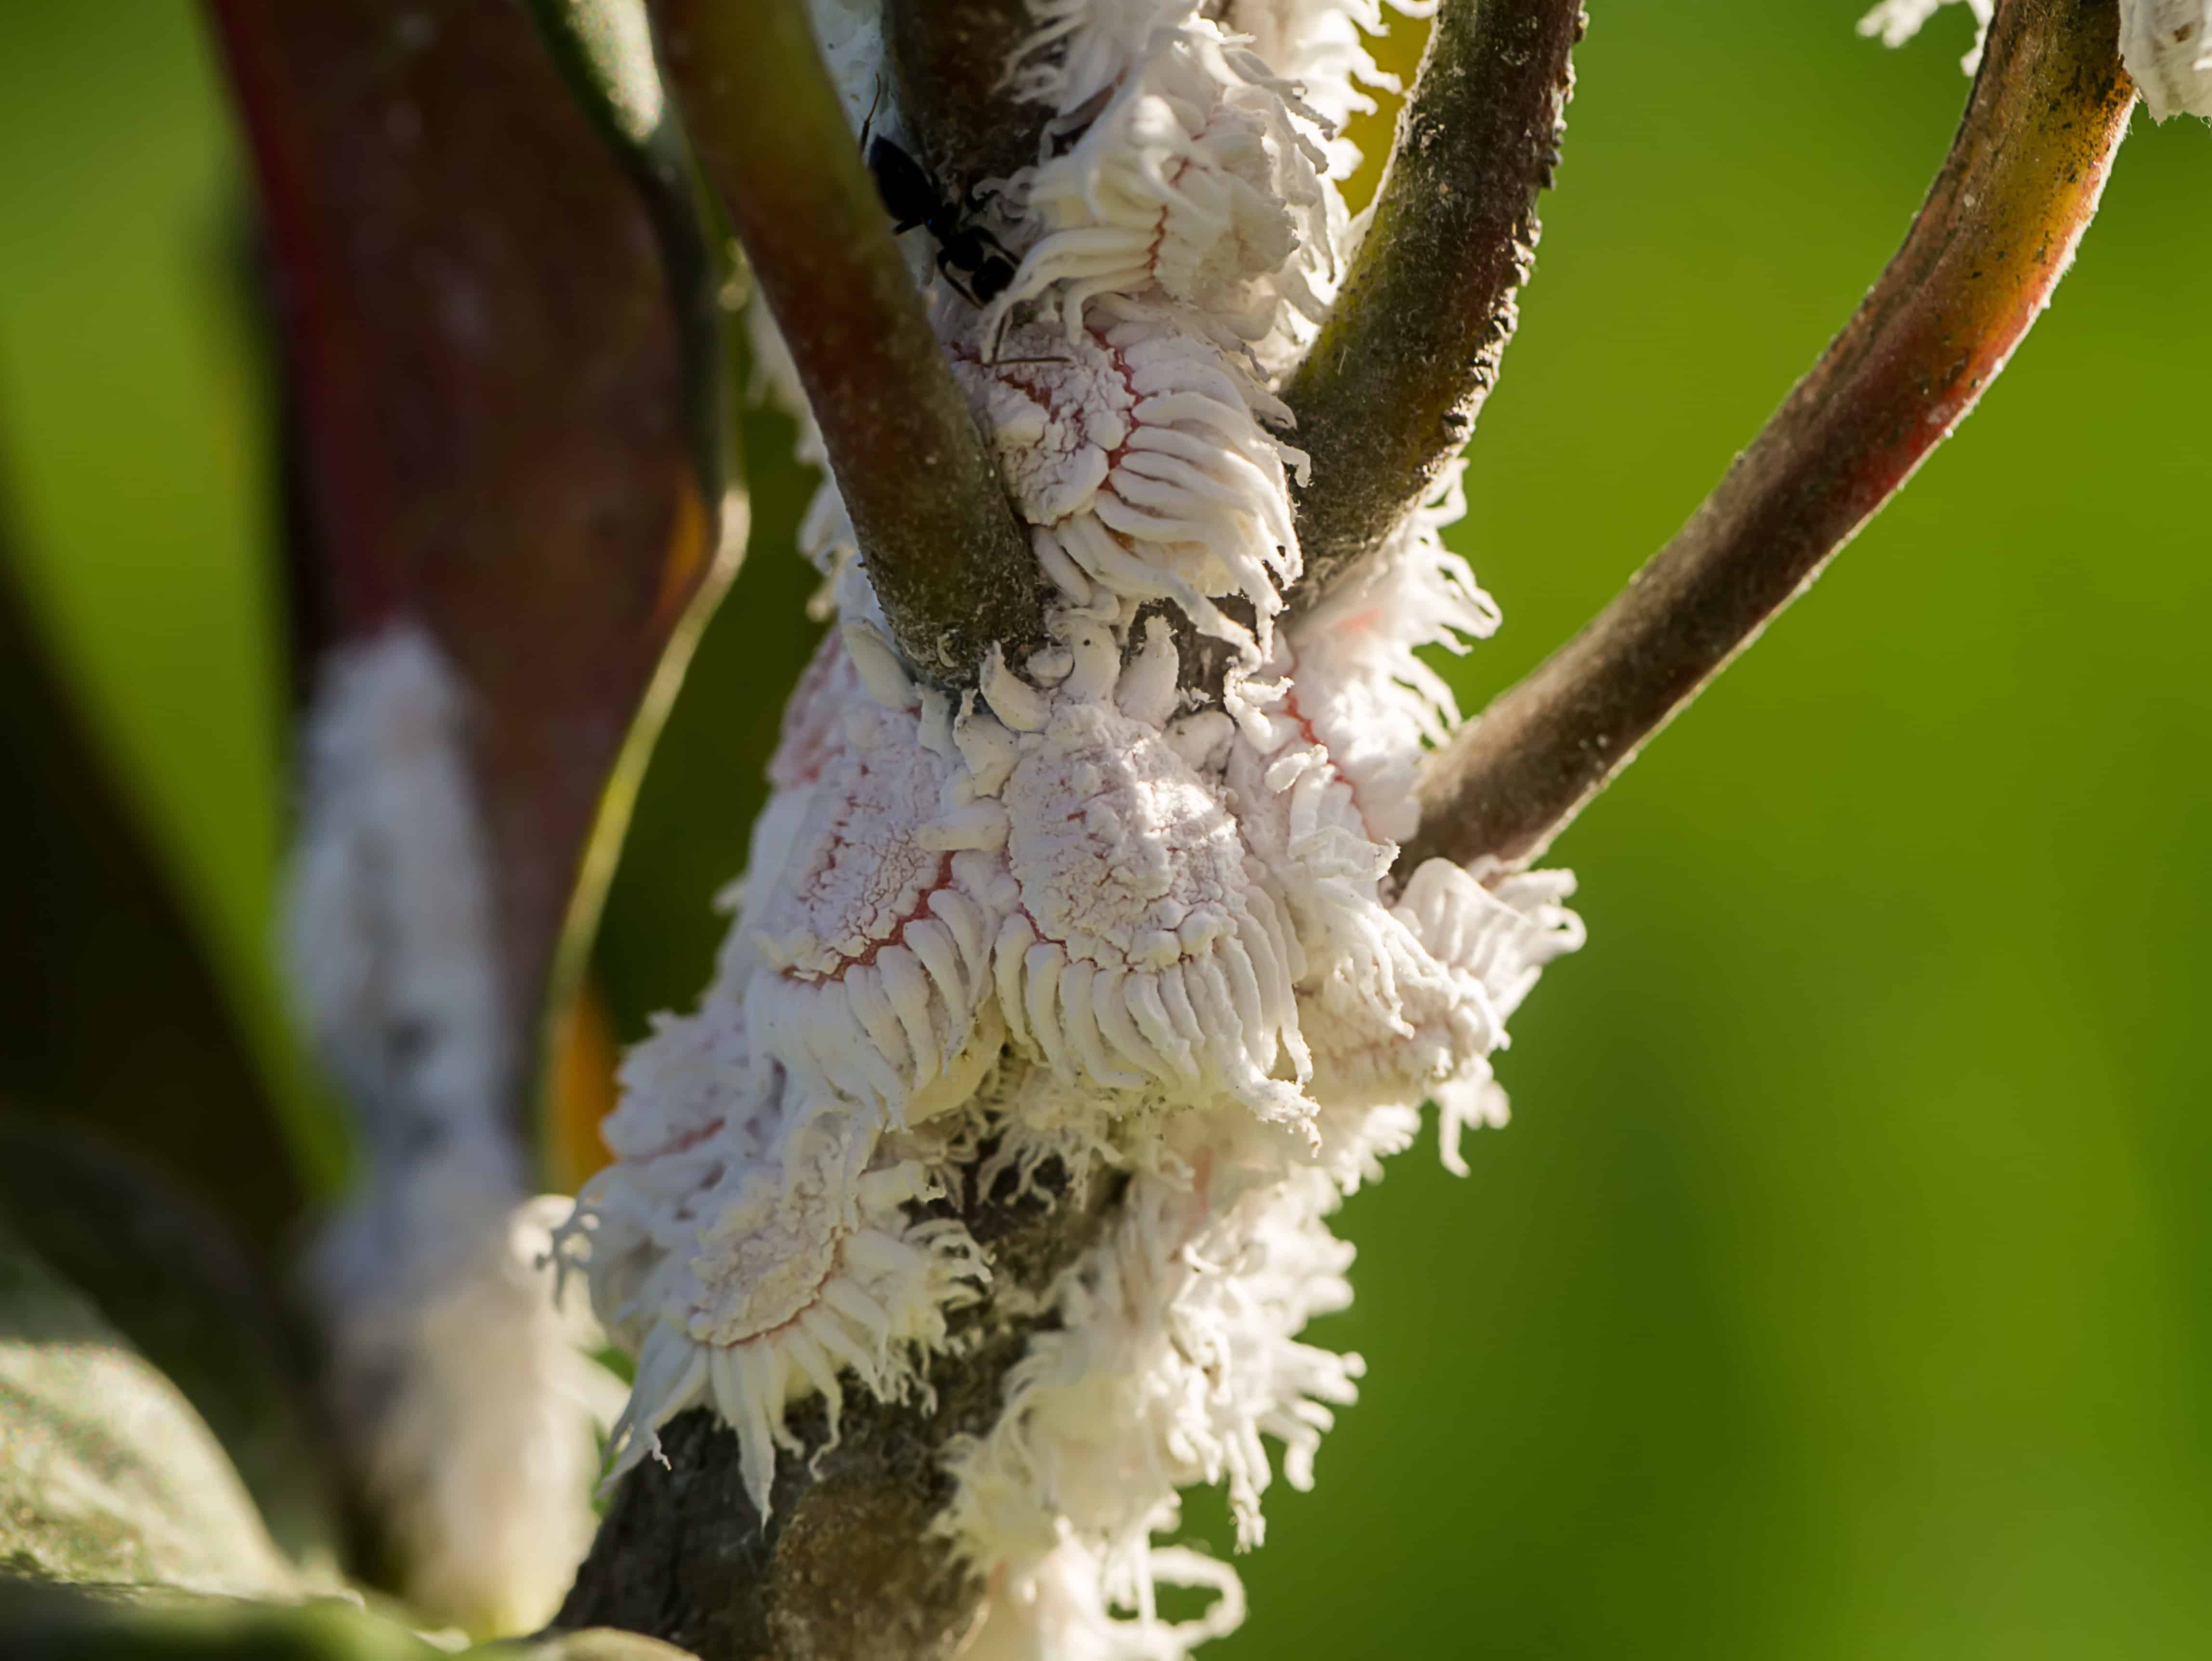
Mealybugs
- What do they look like? These are oval, white cotton-like insects about 3-6mm long that move slowly. Think tiny fluff balls, kind of cute but deadly to your plants when left to go rampant.
- Where can I find them? Look in hidden areas like unfurled leaves, creased intersected sections between leaf and stem, especially around new growth. These little buggers love hiding in hard-to-reach places, like that one itchy spot on your back that you could never reach on your own.
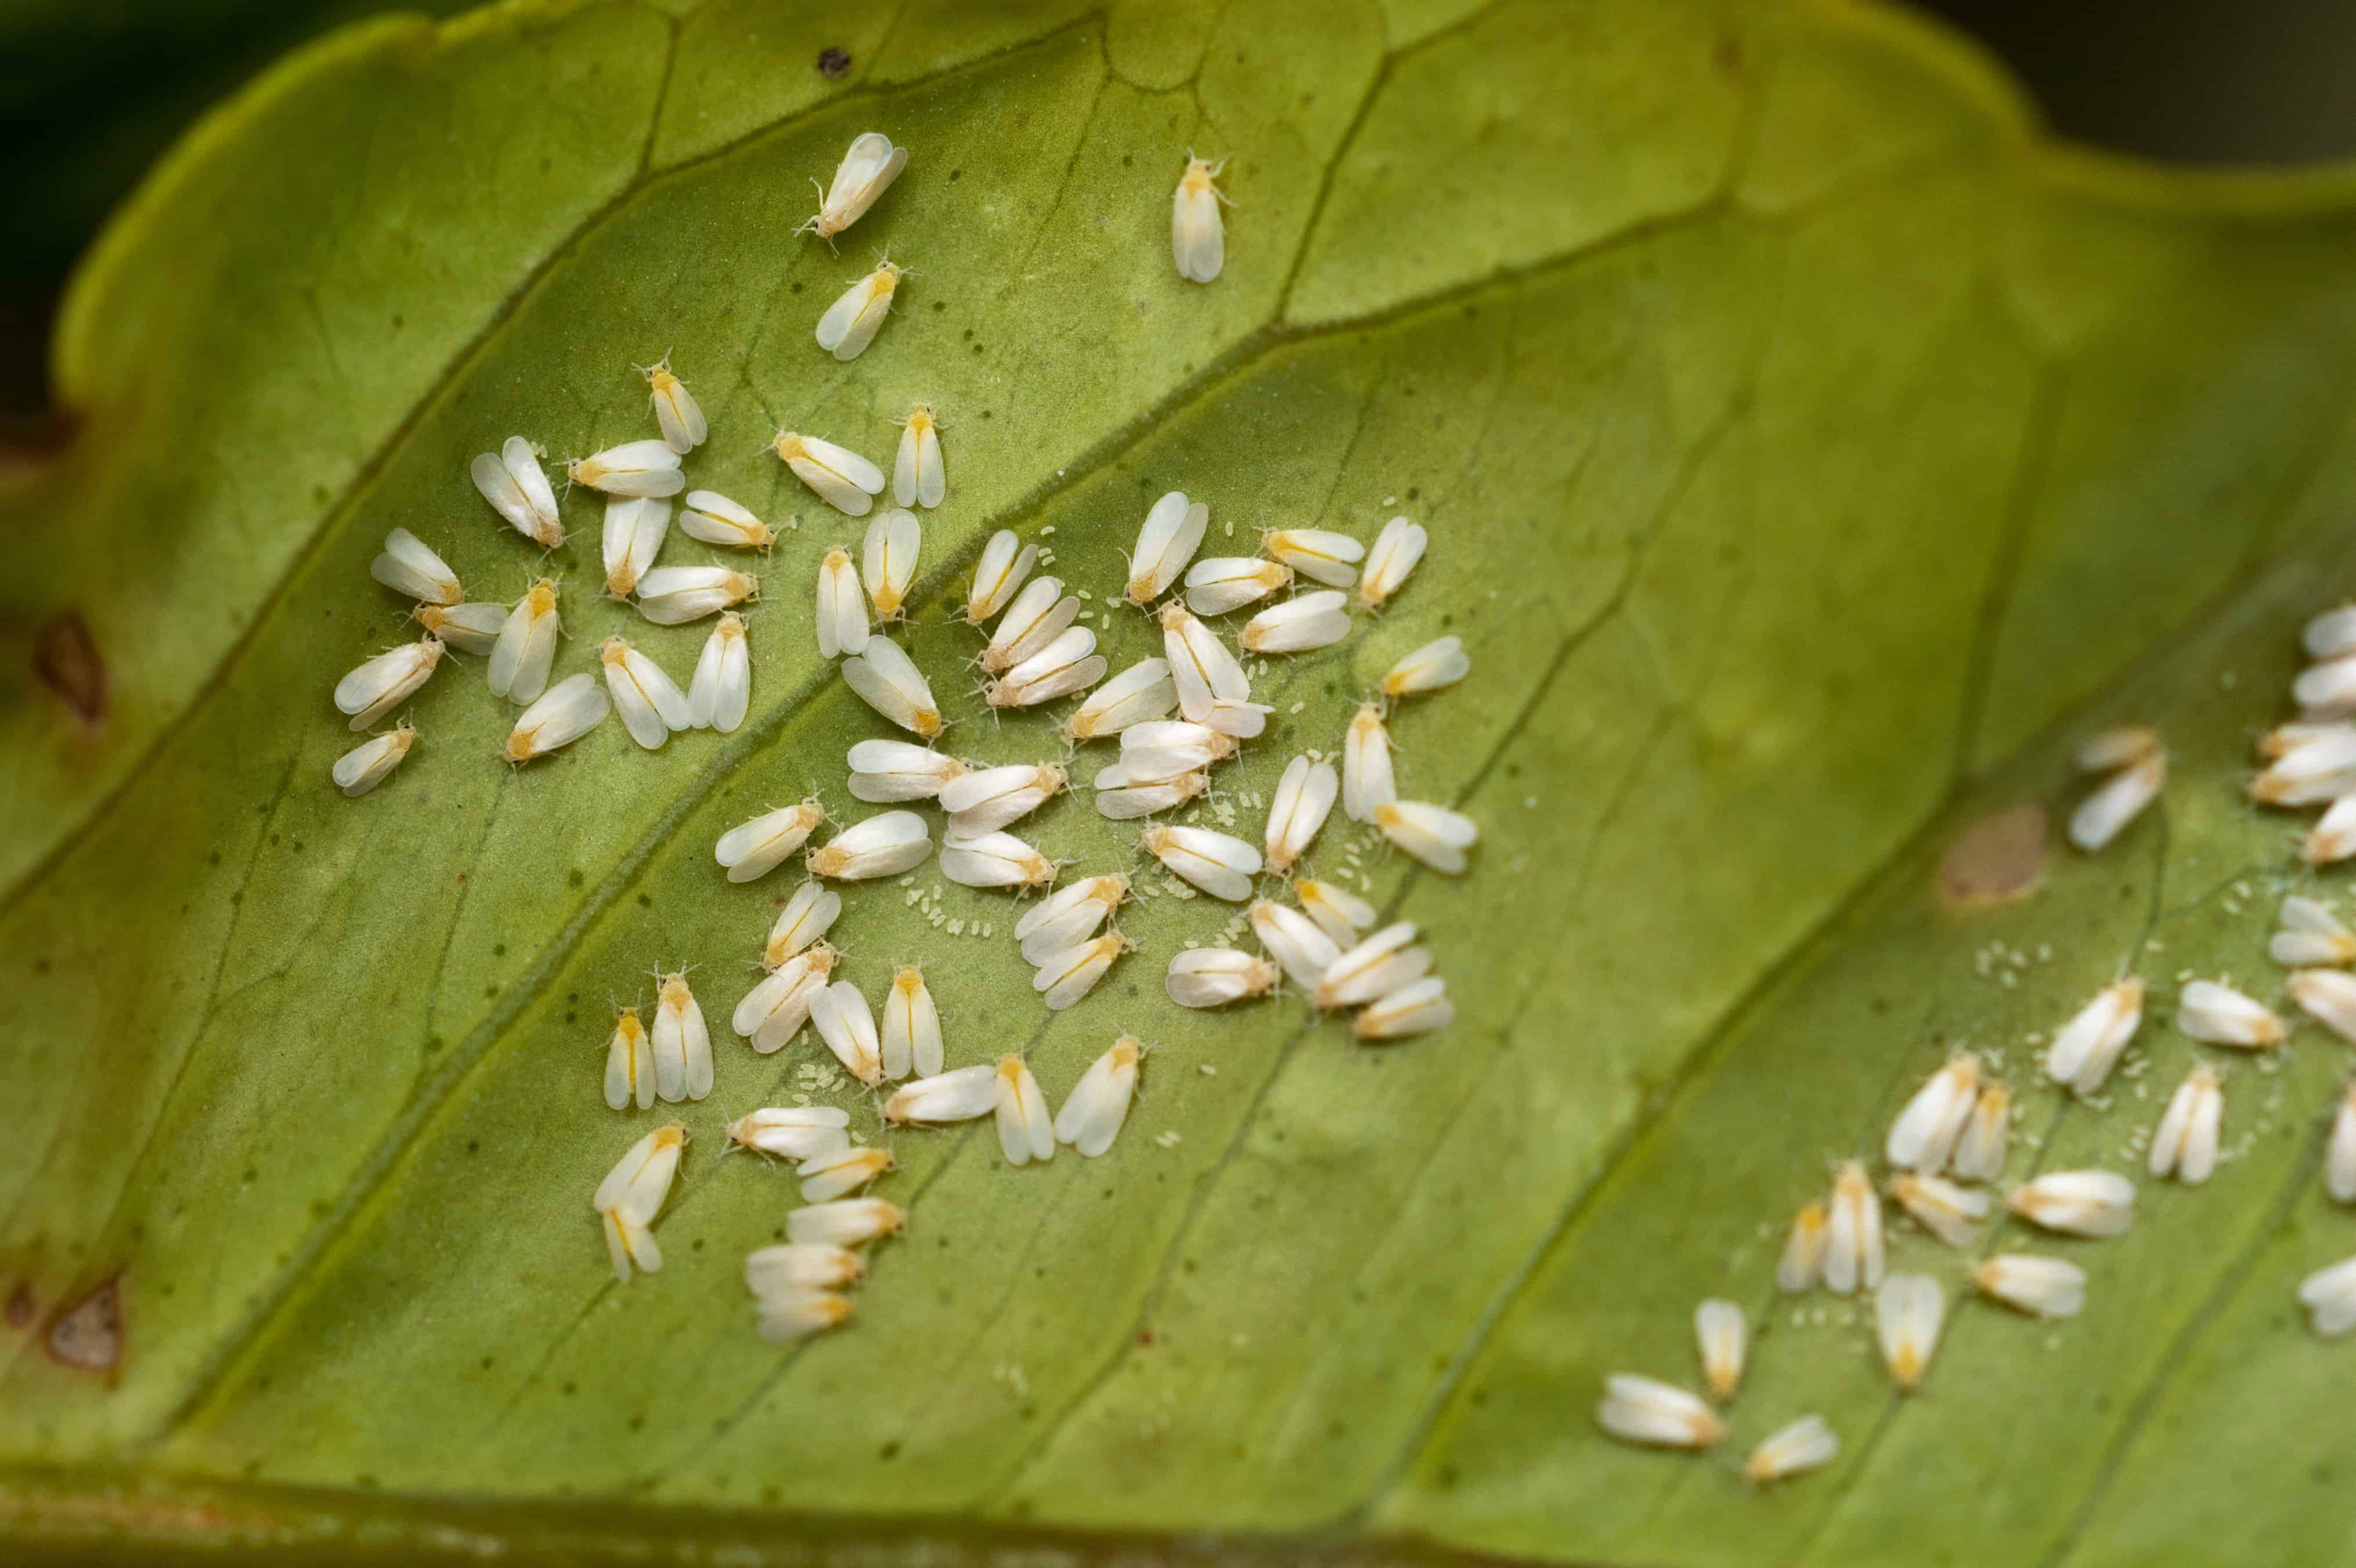
Whiteflies
- What do they look like? Somewhat similar to mealybugs or tiny white moths, these insects have a powdery appearance and are about 1.5-2.5mm long.
- Where can I find them? Once you move the plant or run your hands through the plant’s foliage or blooms, they are likely to show up and flutter about the place from being disturbed.
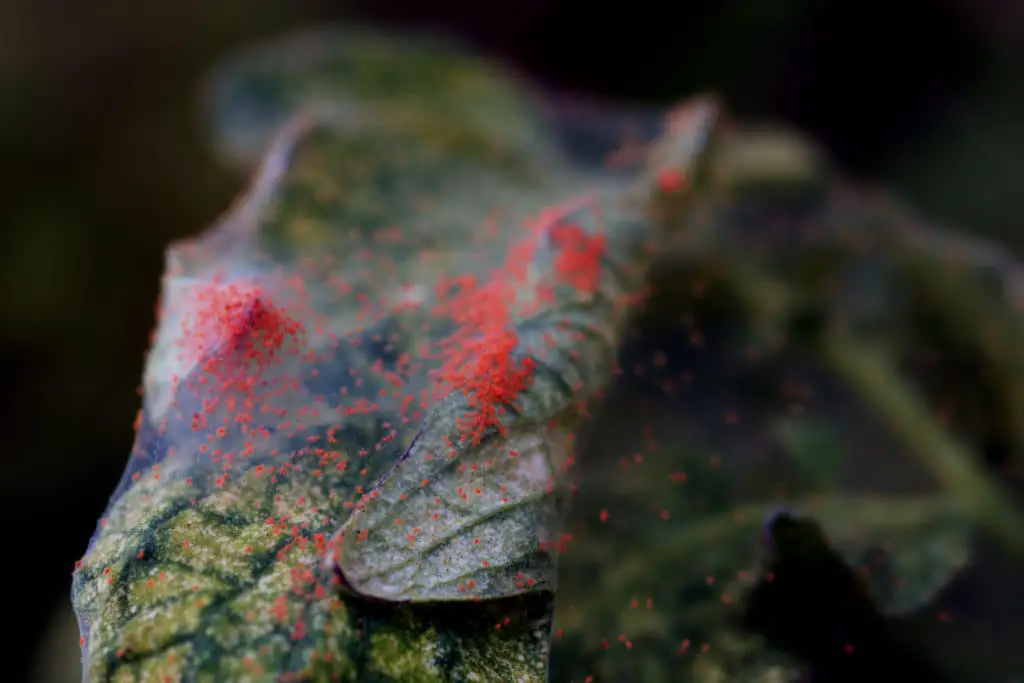
Red spider mites
- What do they look like? These pests are not strictly insects but are closely related to spiders instead. They are pretty tiny and will resemble red dots or reddish film on the plants. I suggest using a magnifying glass to inspect them closely.
- Where can I find them? Check under the leaves. If you see silky webbing on the plant, that’s a neon sign signaling that yes, they live there now. At least, not until you get your hands on them. Sometimes, you’ll also see pale speckles on the top side of the leaves or damaged leaves with brown dots on them.
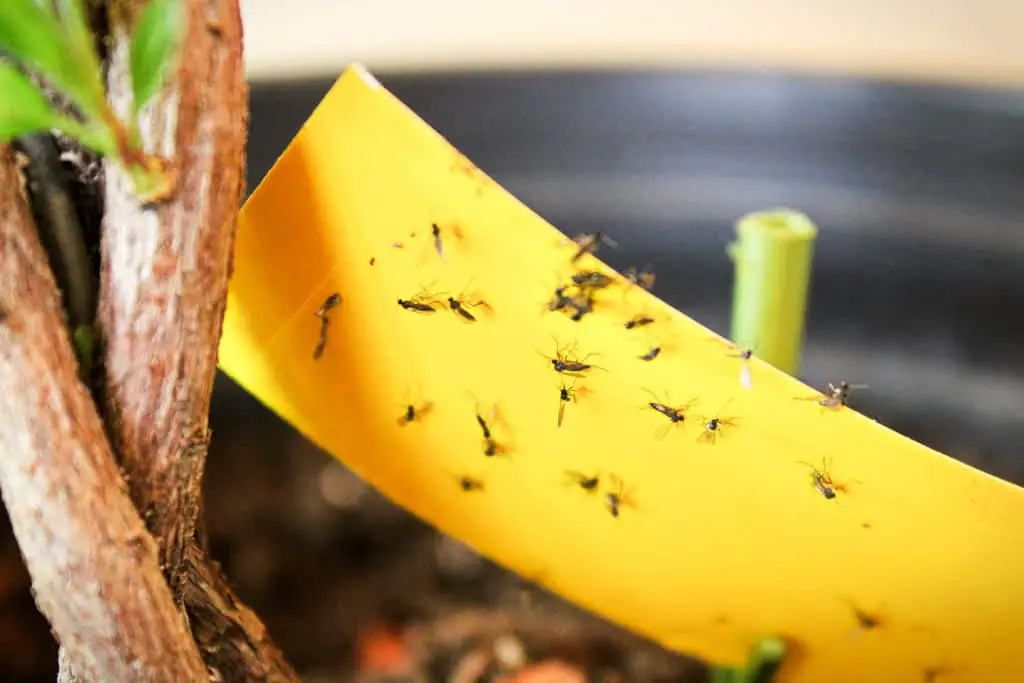
Fungus gnats
- What do they look like? These are not really much of a pest; they’re more of a nuisance around your plants. They look like fruit flies, about 3mm long, weak flyers, and are typically attracted to light. On the other hand, their larvae are white and have a known shiny black head, and can grow as big as 6mm long.
- Where can I find them? You’ll usually see them hanging around the soil where their larvae are.
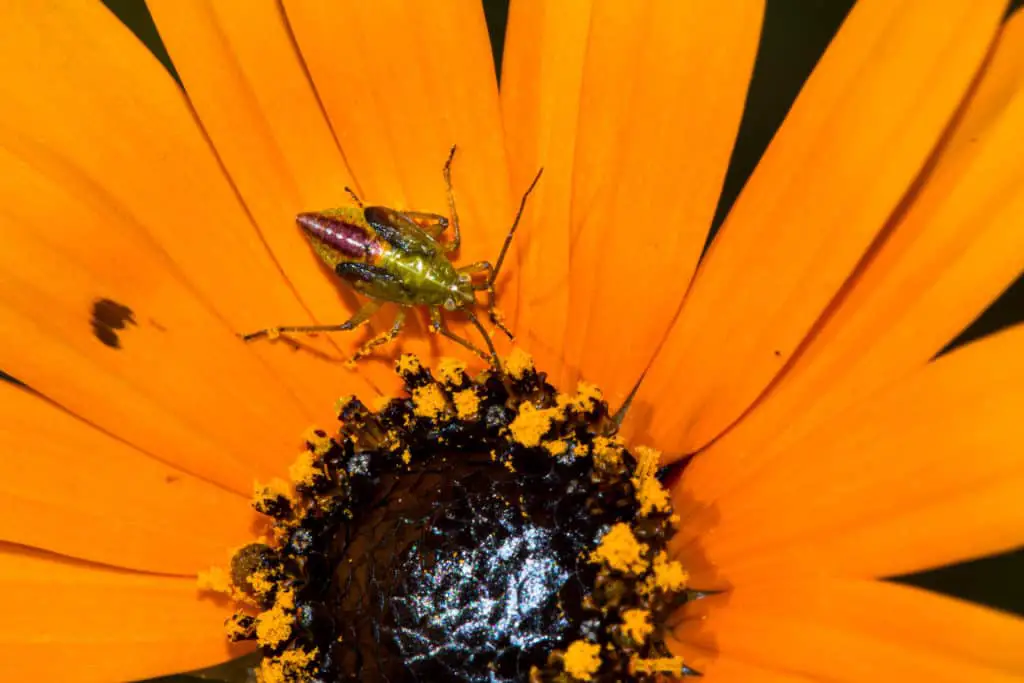
Thrips
- What do they look like? These pests are not common, but boy, are you in trouble if you do have them. They are thin insects with wings less than 1.5mm long and can be brown, black, or greenish-yellow.
- Where can I find them? Check under the leaves thoroughly. If you have a flowering plant, blow in between the flowers, which will make them move so you can spot them.
Once you’ve identified the pesky pest responsible for making your plant sick, move on to the next step.
3. Pick the Pests Off or Hose the Plant Down with Short, Bursts of Water
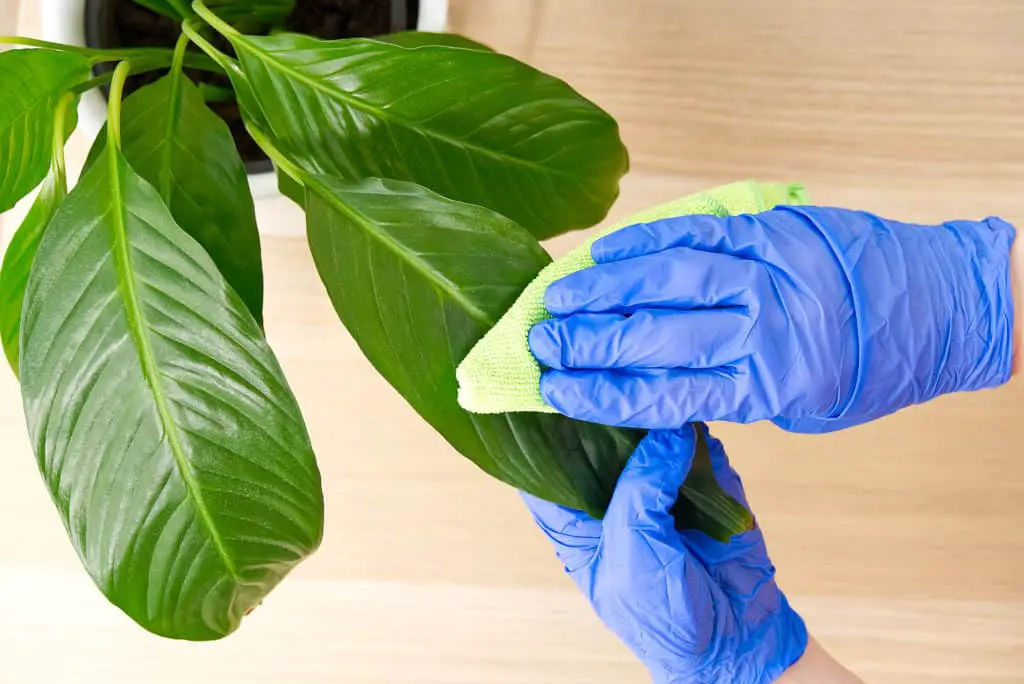
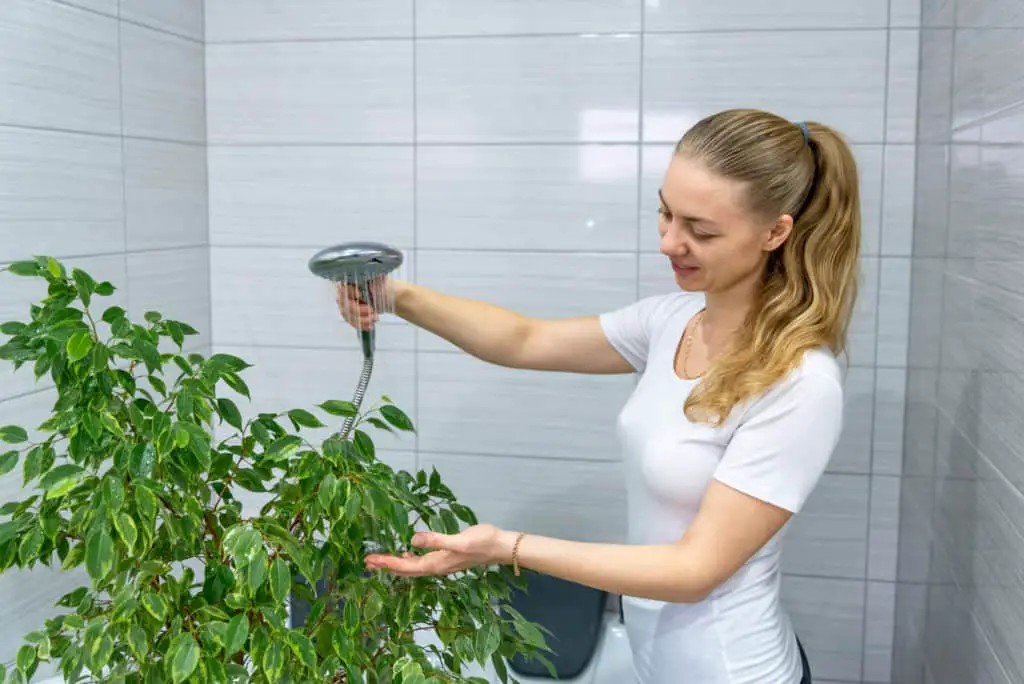
Depending on what pests you’ve found in your houseplants, the method to remove them might vary. But know that this is just the first round of getting rid of them. Before that, make sure to cover the plant’s soil with plastic or aluminum foil. It ensures that the pests don’t drop and take cover in the soil (unless they reside there) and prevent soil run-off.
Here’s a selection of techniques you can do to significantly reduce the current pest population:
- Handpick visible pests off the plant and squeeze them between your fingers. If you’re squeamish, wear some gloves ’cause it’s going to be messy, but vengeance shall be had!
- Use a q-tip or cotton swab dabbed with alcohol and rub this against visible pests. This will usually kill off the insect in one go, so work your way down your plant an inch at a time. Though this technique is handier with stationary or slow-moving pests like scales and mealybugs.
- Spray every inch of the plant down with strong, intermittent bursts of water. You can either do this in the bathroom with a showerhead or outside with a garden hose.
- Wipe the leaves and stems down with a damp cloth soaked in warm, soapy water. Make sure to get every inch and wash the cloth in the soapy mixture in between wipes.
- Catch any flying insects with sticky traps placed in the soil. Unless you’re a master catcher of insects with your bare hands or chopsticks, getting these sticky traps on Amazon will suffice.
- Remove the plant from its pot and wash the root ball cleanly under running water. This method works best for pests living or hiding in the soil, munching on the tender roots. If you’re lucky, the infestation isn’t that bad, and there are still healthy, white roots remaining. Ensure to get rid of the old soil and repot the plant in a new pot with fresh soil.
I recommend doing any of these methods weekly (except option ‘F’) to discourage any insects from doing their proverbial tango and settling down in your houseplants.
If the infestation is too extensive, you may have to settle with discarding your plant and the infected soil entirely. Cut off any salvageable healthy foliage or stem remaining to propagate them instead. However, there’s no guarantee that it will survive or that it isn’t infected, so if the propagation isn’t successful, don’t beat yourself up about it.
4. Snip off Infected Leaves, Flowers, and Stem(s) on the Plant
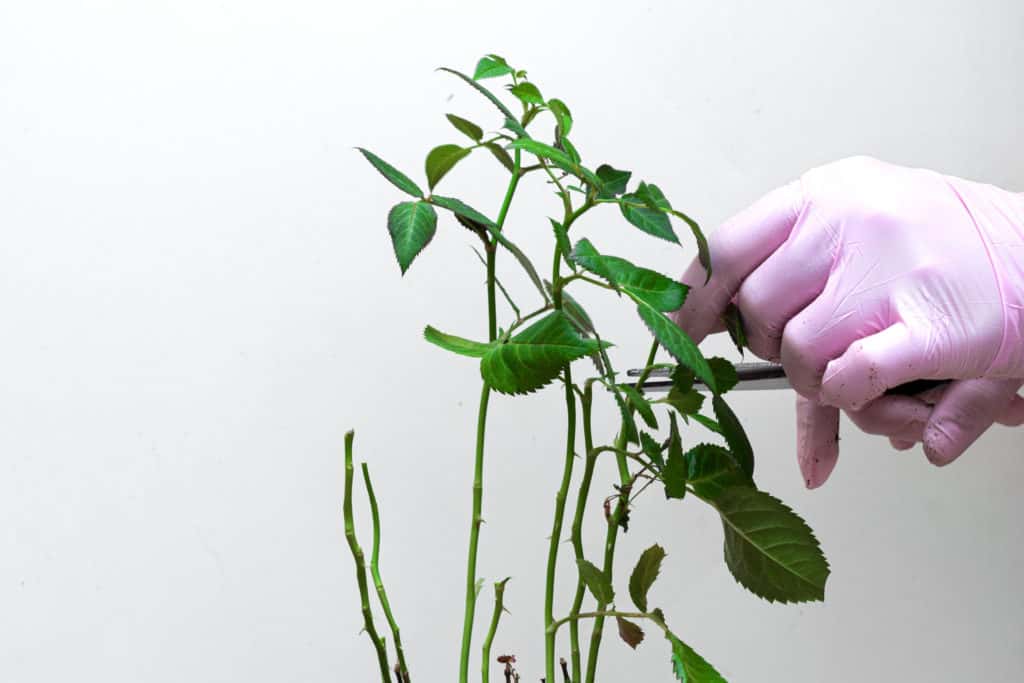
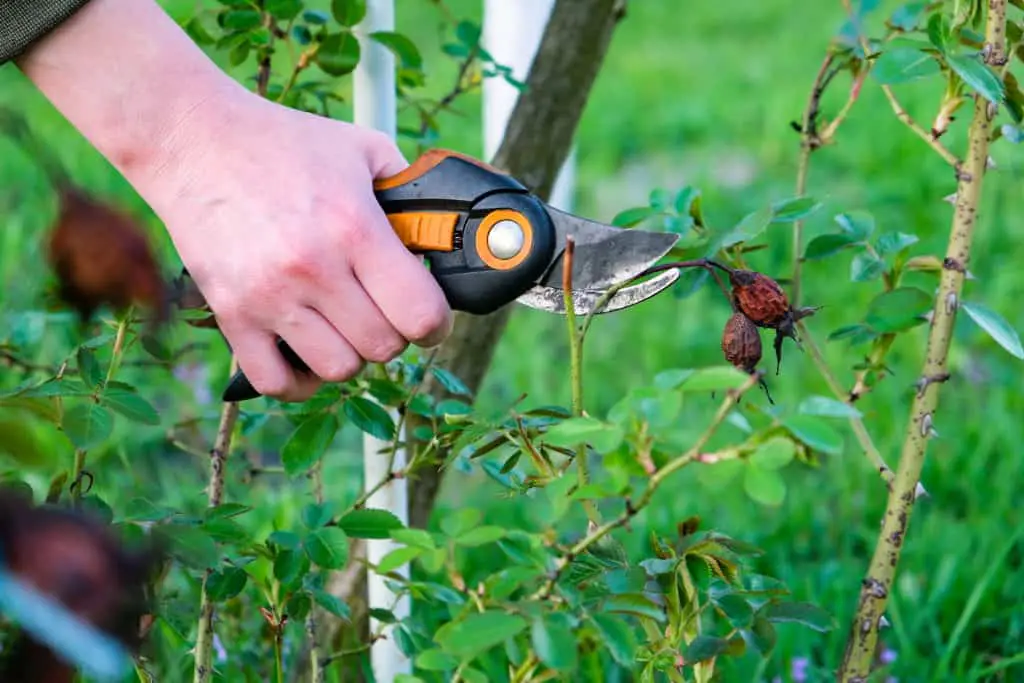
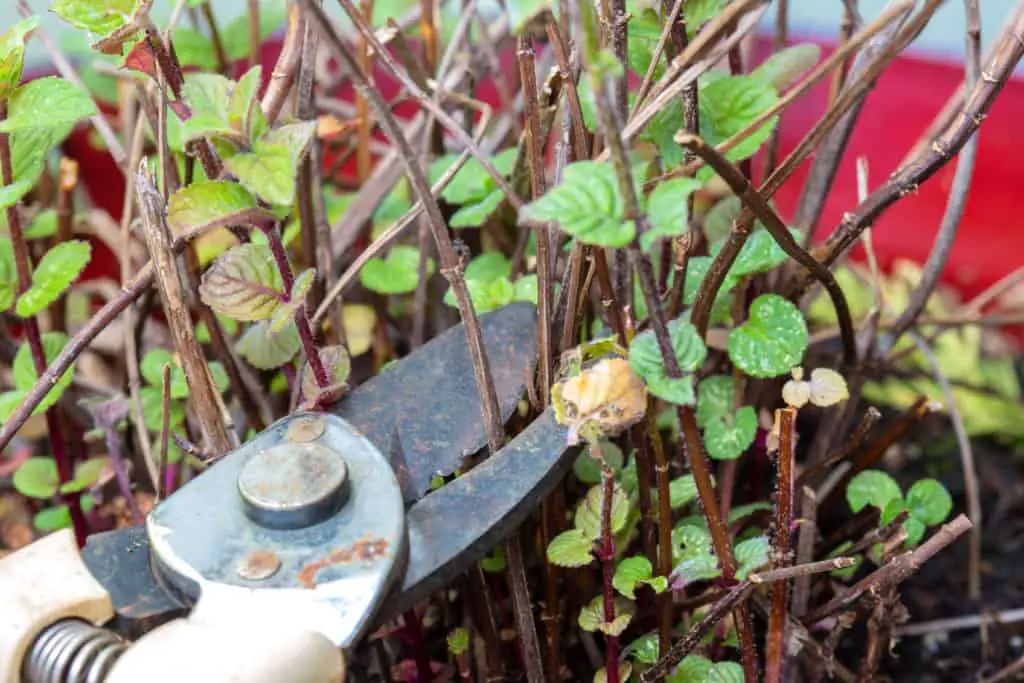
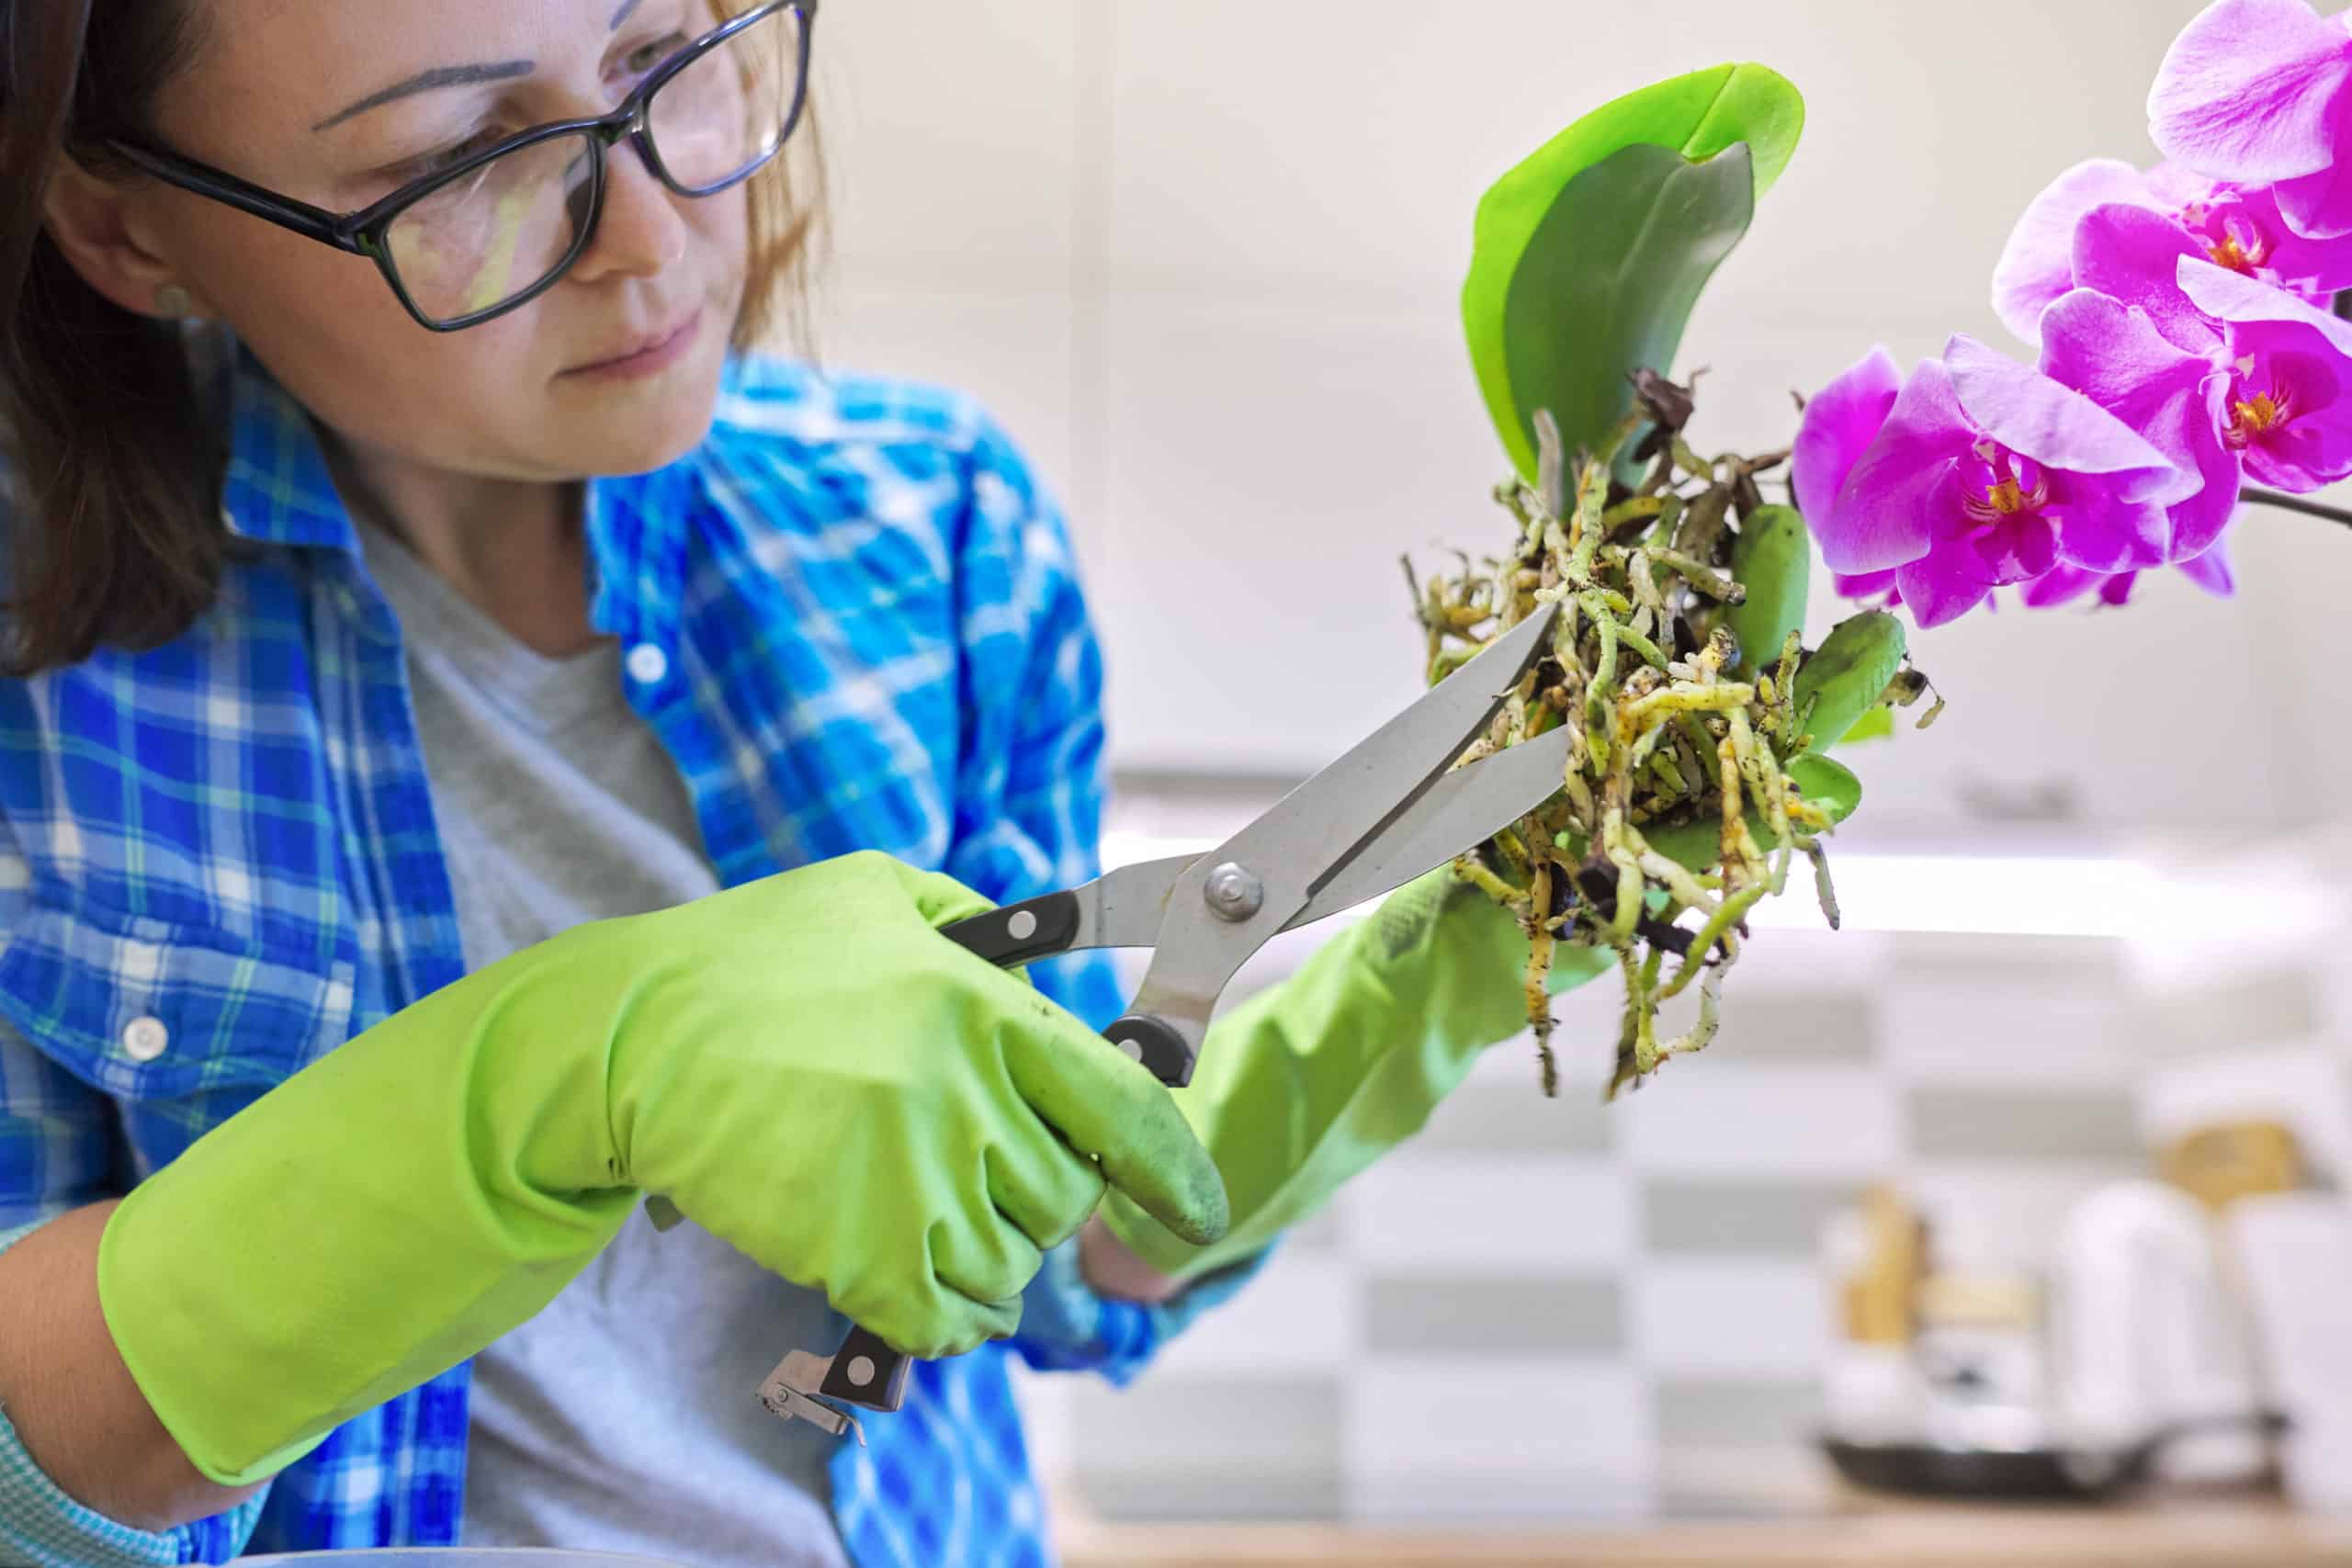
Whether your plant is infested with pests or infected with disease, it is time to do some heavy pruning to save it. But before that, you want to minimize pathogens from transferring to the healthy parts of your plant or any other plants you’re about to nurse back to health. Otherwise, you’ll just make the problem spread or possibly get worse for the plant you are trying to cure. It is advisable to disinfect your cutting tools before, during, and after the whole process. Tedious, I know, but with this little bit of effort, you’re increasing your plant’s chances for recovery. Here are two methods you can use:
A. Using Ethyl or Isopropyl alcohol. (I personally prefer this, it’s quick and convenient!)
- Apply a few dabs of alcohol on a clean cloth or tissue.
- With the damp cloth or tissue, wipe the cutting tool thoroughly.
B. Using household bleach. (Note: Use gloves when handling this mixture)
- In a bowl, mix 1 part of bleach with 9 parts of water. The measurement for this could be something like 1 cup of bleach and 9 cups of water. Adjust as needed for your uses.
- Soak the cutting tool in this mixture for 30 minutes.
- Wash the cutting tool with hot, soapy water and rinse thoroughly.
- Wipe the cutting tool dry before use.
Now let’s get down to business to defeat these bad guys:
- Be ruthless here and get rid of as many damaged/infected leaves and flowers as possible.
- For stems, you’ll have to cut them down to the healthy parts, which is usually pretty manageable if you’ve caught the disease early on.
- Remove any debris littering the topsoil like fallen leaves and twigs.
- Scrape mold off the topsoil, remove some parts of the soil if you need to, and dispose of them properly. Make sure to wear a mask and gloves when handling this.
Make sure to throw all of these cuttings directly into the rubbish bin and not attempt to compost them. The pathogens may survive in your compost pile and wreak havoc on other plants when you use the compost.
Now, let’s pause for a moment here. I have bad news for plants diagnosed with a virus: There is no cure or treatment for this. Even if you get rid of the infected leaves, chances are the viral pathogens are well underway, destroying the rest of the plant’s cell walls. So propagating is out of the question; you’ll only be giving the disease a new home. This applies to severely damaged plants with barely any healthy foliage, flowers, or stem(s) left. The only thing you can do is dispose of your plant and its soil thoroughly, making sure to clean and disinfect its pot.
5. Apply Neem Oil Solution Spray on your Plant Weekly for 1 ½ Months
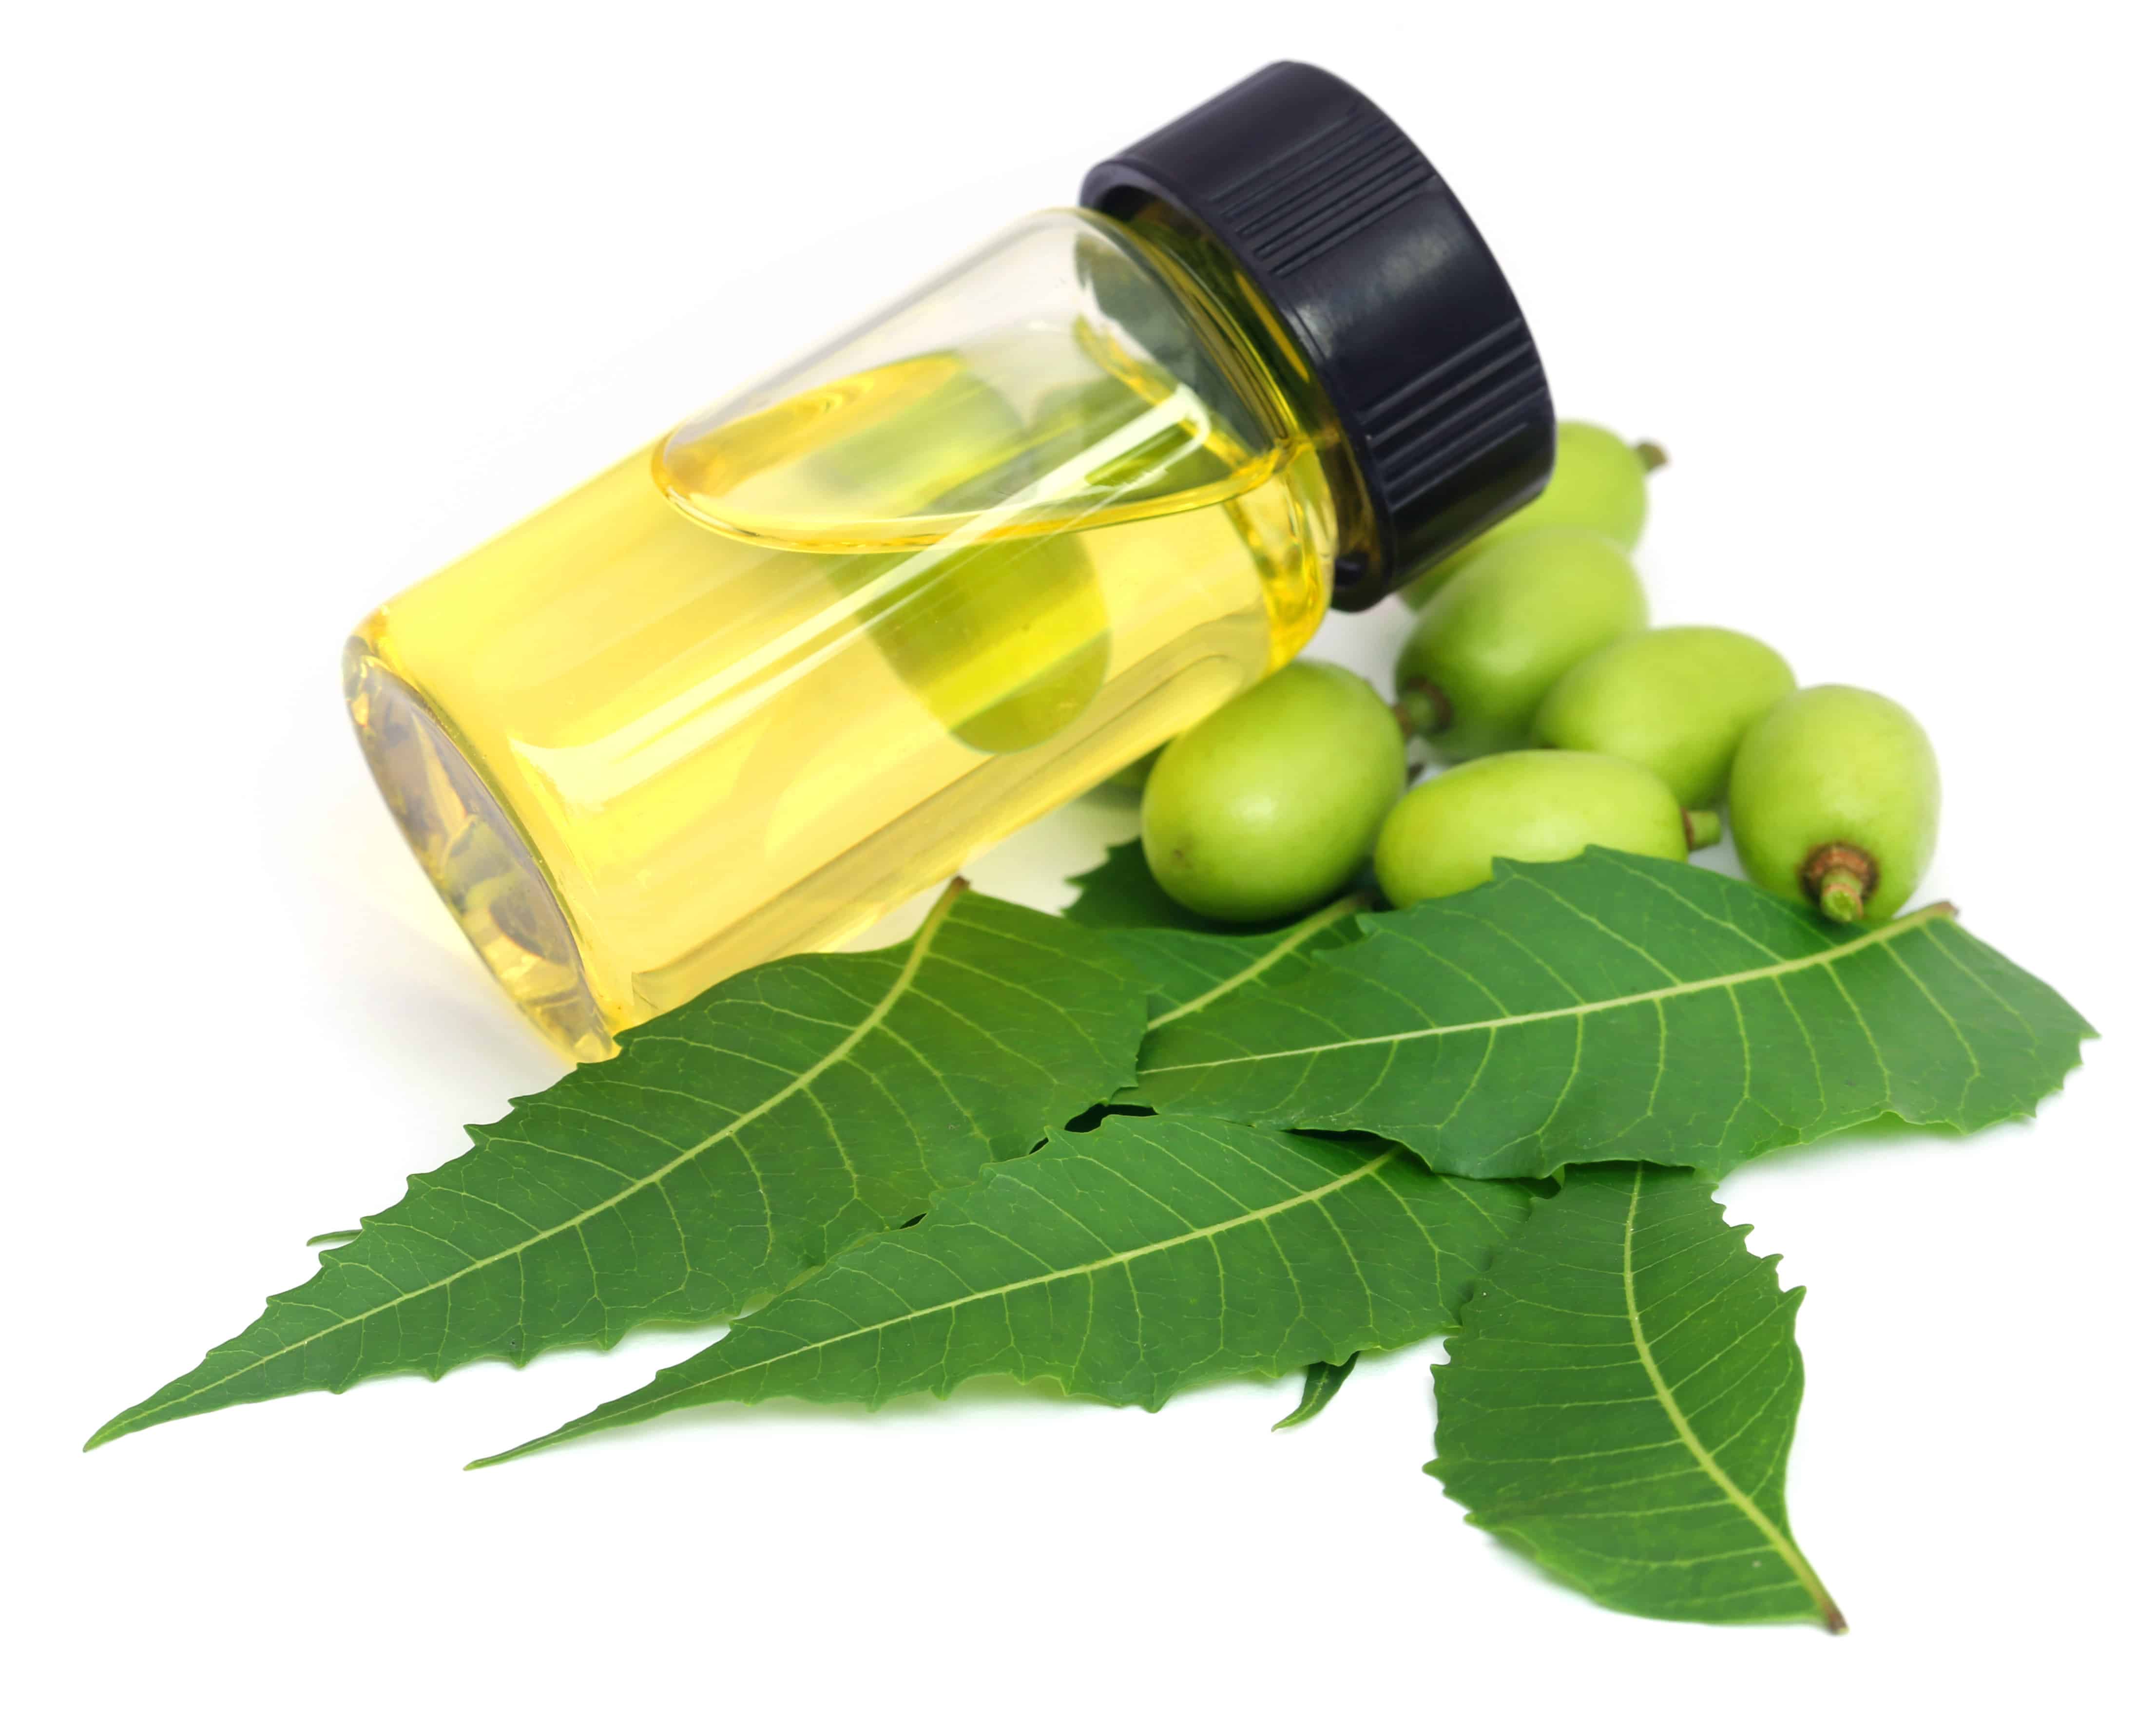
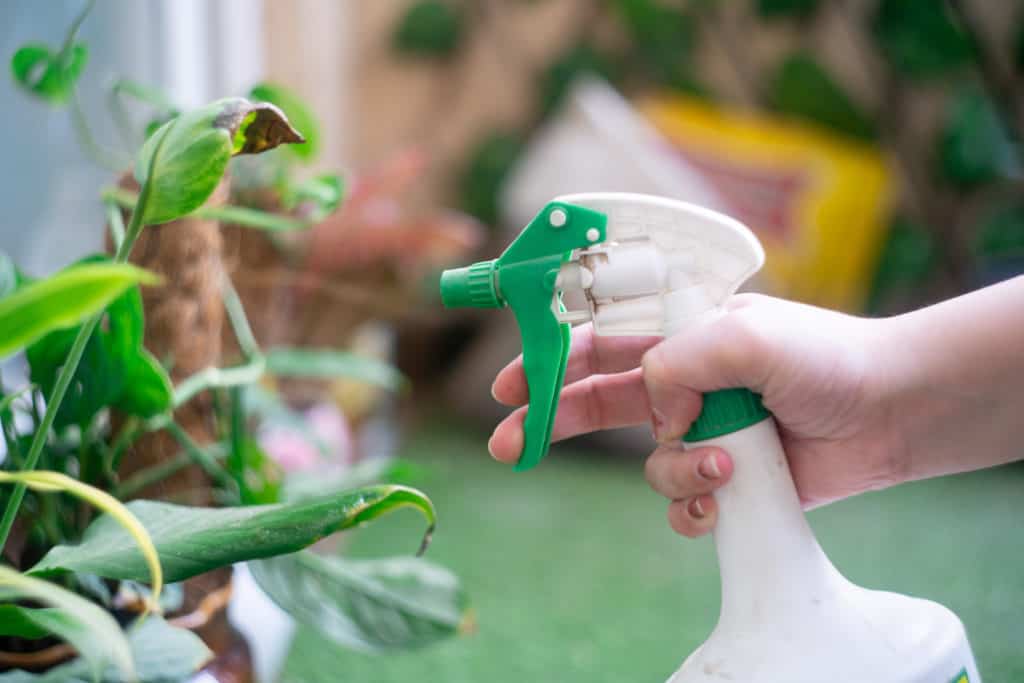
This additional step is beneficial in ensuring the infection or infestation doesn’t make a comeback after pruning off the affected parts on your plant. Typically, using a Neem oil spray diluted in water, and a soapy solution will be sufficient for pests and disease problems. You can get this Neem oil on Amazon to get you started. But you are more than welcome to use another product if it is known to work better with the particular plant species you are working with.
Here’s how you can make a Neem oil spray solution:
- In a bucket, mix 1 teaspoon of liquid soap and 1 gallon of water vigorously.
- Add 4 teaspoons of Neem Oil to the soapy solution and mix well. Careful, it stinks!
- Place some of the solution into a spray bottle to use on the whole body of the plant(s). Make sure to apply the solution on both the top and bottom of the leaves. Do this weekly for the next 1 ½ month.
- Store the rest of the solution in a cool, dry place.
A note on pesticides: The more chemical pesticides you spray on pests, the more you’re encouraging them to breed generations of chemical-resistant younglings. So sticking to organic and natural methods is your best bet is keeping them away. o
An optional way of going about this second round of treatment is to set beneficial insects in your plants to act as natural predators to pests. These pests accumulate so rapidly indoors because they don’t have the Big Bitey Bois to keep their population in check. If you feel like this method is your speed, I recommend keeping your plant(s) in a confined space like a large, clear container with holes in them for airflow.
Here is a handy table of pests and their nemesis counterparts, the beneficial helper insects to aid in your pest problems:
| Houseplant Pests | Beneficial Insects i.e. Natural Predators |
| Aphids | 1. Green lacewing larvae 2. Ladybug larvae |
| Mealybugs | 1. Green lacewing 2. Mealybug destroyer (how fitting!) |
| Whiteflies | 1. Green lacewing 2. Ladybird beetle 3. Whitefly parasite (oof, tough luck here) |
| Red Spider Mites | 1. Phytoseiulus sp. (a type of mite) 2. Minute pirate bugs (arr!) 3. Green lacewing larvae |
| Fungus Gnats | 1. Stratiolaelaps Scimitus (a type of mite) 2. Nematodes |
| Thrips | 1. Thrip predator (How bad do you have to be to have your own predator?!) 2. Minute pirate bugs |
Now, if you’ve read this far, this is a great time to examine the rest of your plants to see if the infestation/infection has spread to them. Go back now and repeat steps 1 – 5!
6. Rejoin your Plant Back with the Rest of the Plants
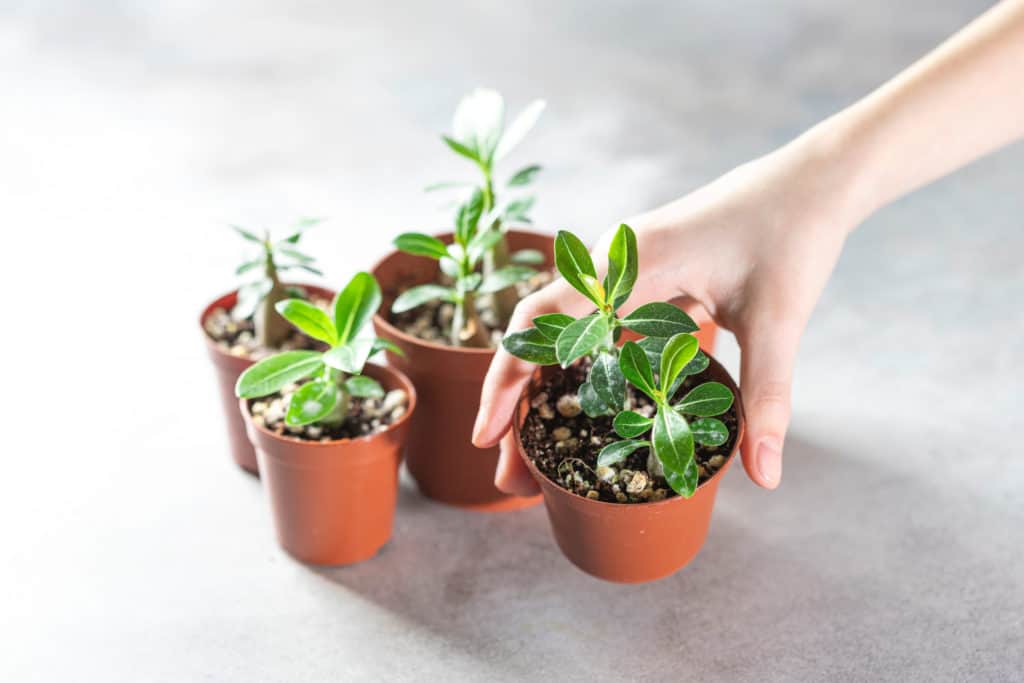
After the laborious effort of nursing your plant back to health, you can put it back with your other plants once there are no signs of any infections or infestations popping back up. Take a breather because, man, you did a lot to get to this stage.
Now, obviously, you want to prevent this from ever happening again. Here are a few tips to include in your daily houseplant care as preventative measures against pests and diseases:
- Always inspect a plant thoroughly for infestations or infections before purchasing. Check the leaves, the stem, and the flowers. Preferably take the plant slightly out of its pot to check the root ball too. The slight disturbance will cause any hidden pests to scurry, so you should be able to spot them. Kindly inform the plant shop owner so they can quarantine the plant and prevent an unlucky buyer from getting a plant with baggage.
- Always isolate new plants from the rest of your plant collection for 1 ½ month. Check the stem and leaves daily, especially under the leaves where pests usually hang out. Heck, bust out the magnifying lens and give that plant a good eyeful!
- Give the plant the best care it needs. Stressed and weakened plants get infected or infested easily. If you want to know more about the proper care of houseplants, click here!
- Let the soil dry at least 1-2 inches before watering; use the knuckle test to check. This is to prevent overwatering from making the soil too soggy for the plant. Additionally, use pots with proper drain holes and well-draining potting soil/mix to help with drainage.
- Prevent splashing water on the foliage. Spores can latch onto wet spots on the leaves and grow, which is why it’s essential to water your plants in the morning so they can dry out throughout the day. Also, don’t mist your plants and avoid overhead watering to prevent splashback; always water the plants at the soil level.
- During watering sessions, always check the plant for any abnormalities. Examine under the leaves, center of the plant, the main stem, and soil. Only you know what your plant looks like, so if one day it seems odd, then you’ll have to look closely for what’s causing its unusual change.
- Keep the plant’s topsoil free from debris like fallen leaves. It’s normal for plants to shed their leaves as they mature. But letting it decompose on the soil is an invitation for pathogens and pests to come in and dine on the free dirt buffet.
- Wipe smooth leaves every 2-3 weeks with a damp cloth so pests can’t hang around. Large plants should be gently hosed down, but cover the plant’s soil with plastic beforehand.
- Never let other plant’s leaves touch the leaves of a new plant. The reasoning behind this is to prevent transferrable pathogens or infestation from pests wandering next door because of a very convenient leaf bridge set between the plants. Remember the last time people got into your personal space, and you didn’t want to say anything for fear of being rude or offending the other person? My dude, tell them to kindly back up and do the same for your plants.
- Inspect the root ball for rotting root tendrils or hidden pests you can remove when repotting your plants. This is one of the few times you can observe the roots, so take your time to inspect them closely. If your plant has root rot, you can read more about this disease in another article here to rescue your plant.
- Use clean pots and fresh potting soil/mix. Ensure to always wash your pots clean and disinfect them with alcohol or bleach solution (9:1 parts water to bleach) before using them, mainly if an infected or infested plant used to be in it. As for soil, man, just don’t reuse old soil and treat your baby plant right. On that note, never use garden soil.
- Always check plants that have been left outside and then brought in. This is the equivalent of making sure your pets don’t waltz in with muddy pawprints and make a mess of your home. Similarly, you don’t want your plants harboring any unwanted hitchhikers as soon as you bring them inside, so thoroughly inspect them. Check the roots, as some could choose to hide here for better camouflage.
- Keep cut flowers taken from outside, away from houseplants. The flowers may be pretty, but they could be double agents and about to betray their cousin plants with pests they brought in from outdoors. Keep them far, far, far away from the reach of the precious houseplants.
And there you have it! That’s really all it takes to keep your plant pest- and disease-free! But remember, it is far better to prevent an infestation and infection from the start, so take care of your plant well. Good luck and happy planting 😀
References:
https://smartgardenguide.com/common-houseplant-diseases/
https://www.canr.msu.edu/news/root_rots_can_you_tell_the_difference
https://www.ourhouseplants.com/guides/house-plant-diseases
https://www.gardeningknowhow.com/plant-problems/disease/how-to-get-rid-of-sooty-mold.htm
https://www.bioadvanced.com/articles/signs-common-houseplant-diseases
https://hgic.clemson.edu/factsheet/houseplant-diseases-disorders/
https://extension.psu.edu/preventing-diagnosing-and-correcting-common-houseplant-problems
https://www.ukhouseplants.com/helpful-tips/identifying-common-houseplant-pests-diseases
https://hgic.clemson.edu/factsheet/common-houseplant-insects-related-pests/
https://homesteadbrooklyn.com/all/2017/1/17/common-insects-pests-on-houseplants
https://www.ourhouseplants.com/guides/house-plant-pests
https://modernfarmer.com/2021/03/the-most-common-houseplant-pests/
https://fifthseasongardening.com/common-houseplant-pests-and-ailments-and-how-to-address-them
https://www.thespruce.com/getting-rid-houseplant-pests-4175044
https://www.abc.net.au/everyday/treating-common-indoor-plant-pests-and-problems/12872812


Leave a Reply